Table of Contents
Quality Service Guarantee Or Painting Free

Get a rental agreement with doorstep delivery

Find the BEST deals and get unbelievable DISCOUNTS directly from builders!

5-Star rated painters, premium paints and services at the BEST PRICES!
Loved what you read? Share it with others!

Deep Clean Your Washing Machine: Step-by-Step Guide & Tips
Published : January 31, 2025, 12:00 AM
Updated : August 4, 2025, 11:54 PM
Author :
![]() priyanka.saha
priyanka.saha
Table of Contents
Noticing a musty odour or residue in your washing machine? What's the best way to give it a thorough deep clean? It's easy to assume that a machine built for cleaning doesn't need cleaning itself, but that's far from the truth. Over time, even the most advanced washing machines can fall victim to detergent residue, lint buildup, mould, and hard water scaling.
A deep clean for your washing machine is essential to remove hidden grime, eliminate bacteria, and keep your machine running efficiently. Without regular maintenance, you're likely to face issues such as persistent odours, water drainage problems, and unclean laundry, despite using the best detergents. Deep cleaning is the most effective way to protect your machine from long-term damage and ensure that every wash is as fresh and hygienic as it should be.
Deep Clean Your Washing Machine
Over time, your washing machine collects dirt, detergent residue, fabric softener buildup, and even mould, especially in hidden spots like the drum edges, rubber gaskets, and detergent trays. Below is the quick information table about deep cleaning for a washing machine:
Quality Service Guarantee Or Painting Free
Get a rental agreement with doorstep delivery
Find the BEST deals and get unbelievable DISCOUNTS directly from builders!
5-Star rated painters, premium paints and services at the BEST PRICES!
| Information | Details |
| Machine type covered | Front load & top load washing machine |
| Ideal cleaning frequency | Once every 1-2 months |
| DIY cleaning materials | Baking soda, vinegar, lemon juice, dishwashing liquid, hot water |
| Average time required | 30-60 minutes |
| Common issues solved | Bad odour, detergent residue, mould buildup |
| Is self-clean mode available? | Yes, on most modern machines |
| Alternative cleaning tablets | Bosch Descaler, dettol washing machine cleaner |
| Professional cleaning option | Available via service providers like NoBroker |
| Cost of DIY cleaning | ₹300-₹500 |
| Suitable for Indian Hard Water? | Yes |
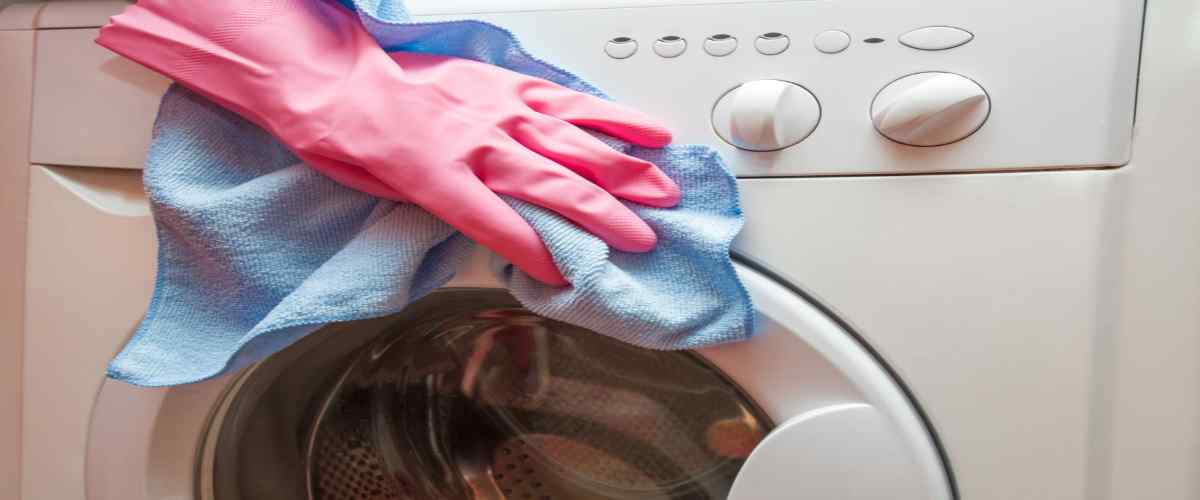
How to Deep Clean a Washing Machine?
Is your trusty washing machine starting to show signs of wear and tear, or perhaps it's emitting less-than-pleasant odours? A deep clean can work wonders in restoring your machine's efficiency and ensuring your laundry smells fresh and clean. In this comprehensive guide, we'll walk you through the step-by-step process of deep cleaning your washing machine, helping you maintain its optimal performance.
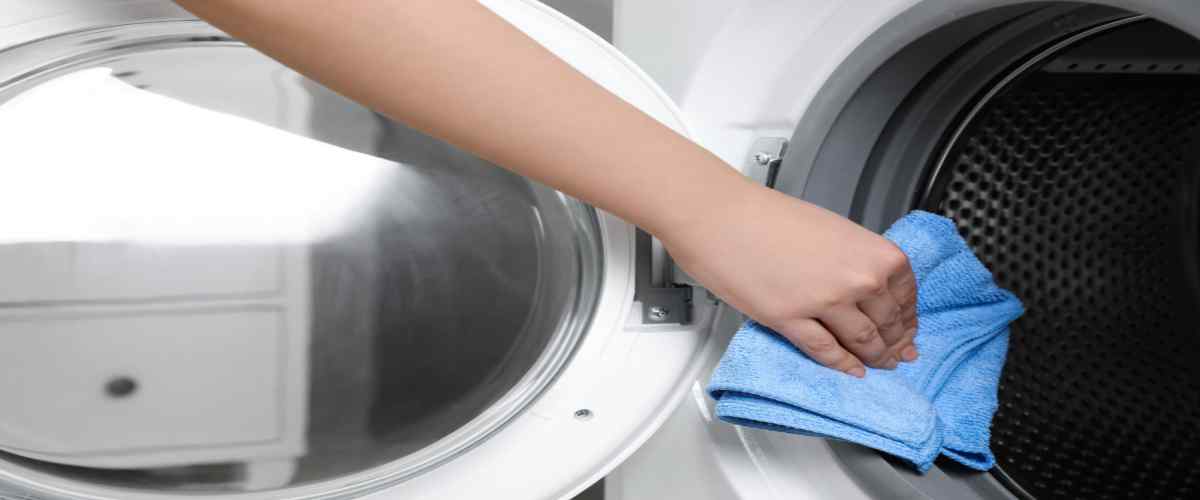
1. Wipe Down the Door Gasket
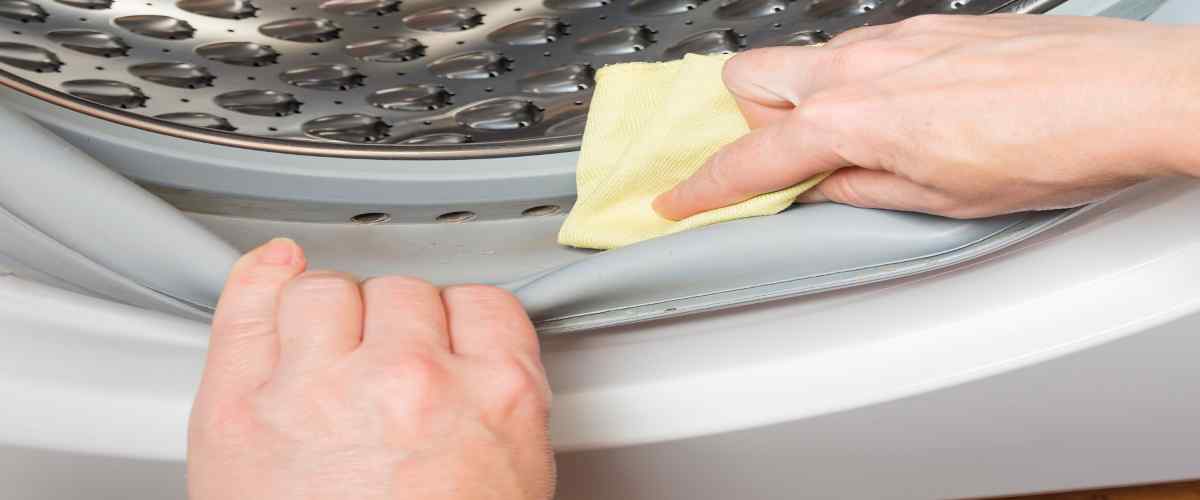
The first step in rejuvenating your washing machine involves addressing one of the most common problem areas—the door gasket. This rubber seal, responsible for keeping water inside the drum, can become a breeding ground for mould and mildew. Here's how to tackle it:
- Begin by mixing a 50/50 solution of water and bleach. Soak a clean rag in this mixture, ensuring it's thoroughly saturated.
- Gently but thoroughly wipe down the entire door gasket, paying special attention to the creases and folds where mould and mildew tend to hide.
Pro Tip: After each use, leave your washing machine door open for a couple of hours. This simple habit helps to air out the gasket and prevents mould growth, keeping your machine fresher for longer.
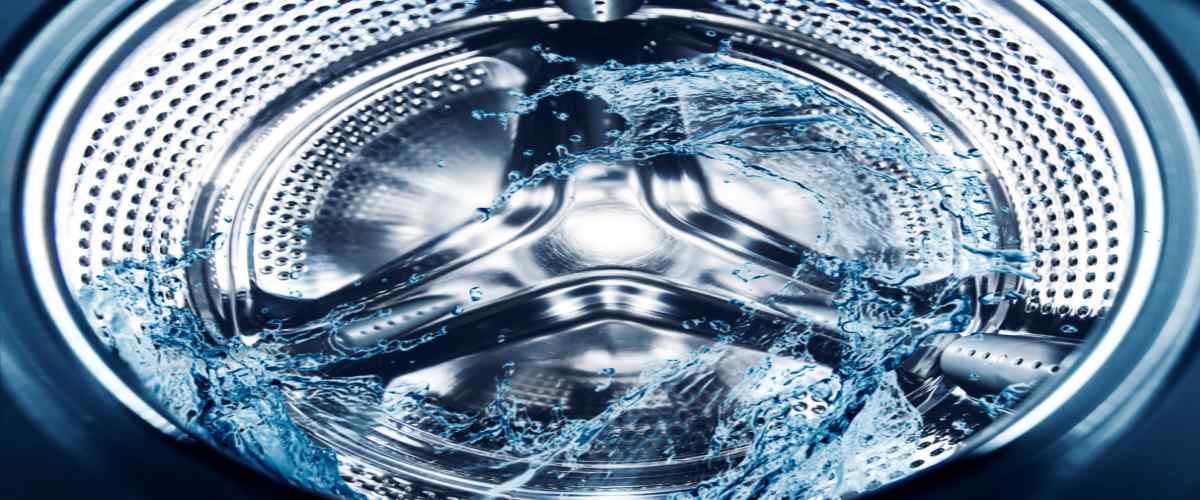
2. Sanitise the Washing Machine Drum
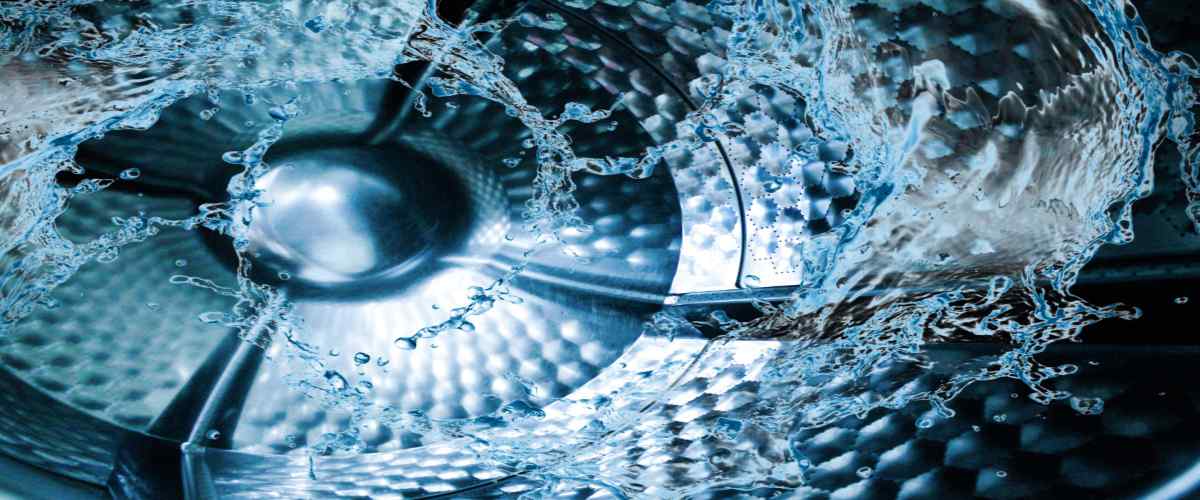
Your machine's drum is where the magic happens, but it can also harbor unpleasant odours and residue. To combat this, follow these steps:
- Begin by filling the drum with a half-cup of baking soda and vinegar for a machine clean.
- Run a wash cycle using the hottest water setting, the largest load size, and the longest wash cycle available on your machine.
- While the cycle is running, take the time to wipe down the exterior of the machine with a cleaning rag soaked in vinegar. Don't forget to use a small brush to reach the smaller nooks and crannies.
Pro Tip: If you happen to spill detergent or fabric softener on your machine, don't wait to clean it up. Many appliances are painted with enamel that can be easily damaged by harsh chemicals like bleach or ammonia.
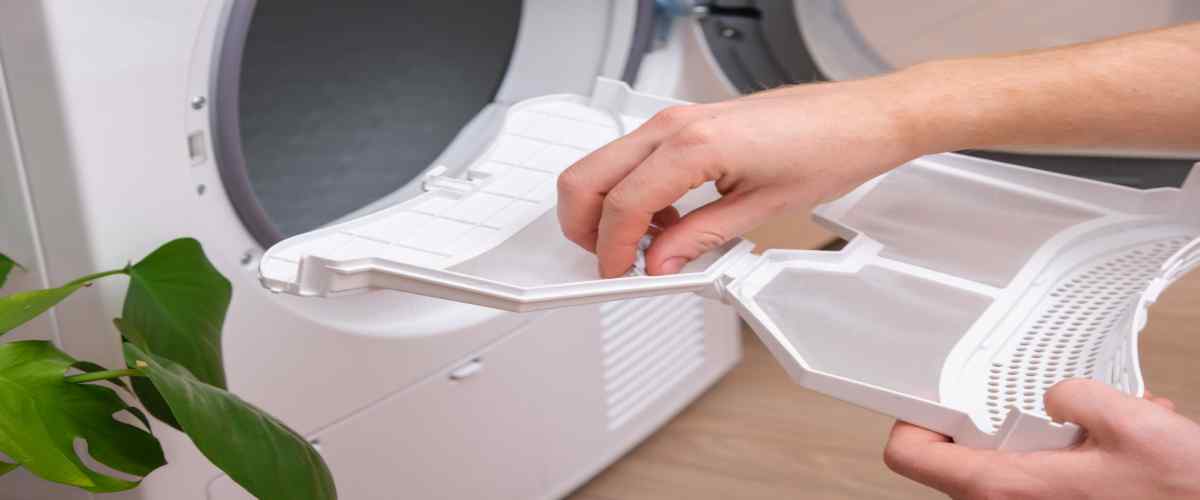
3. Clean the Washer Lint Trap
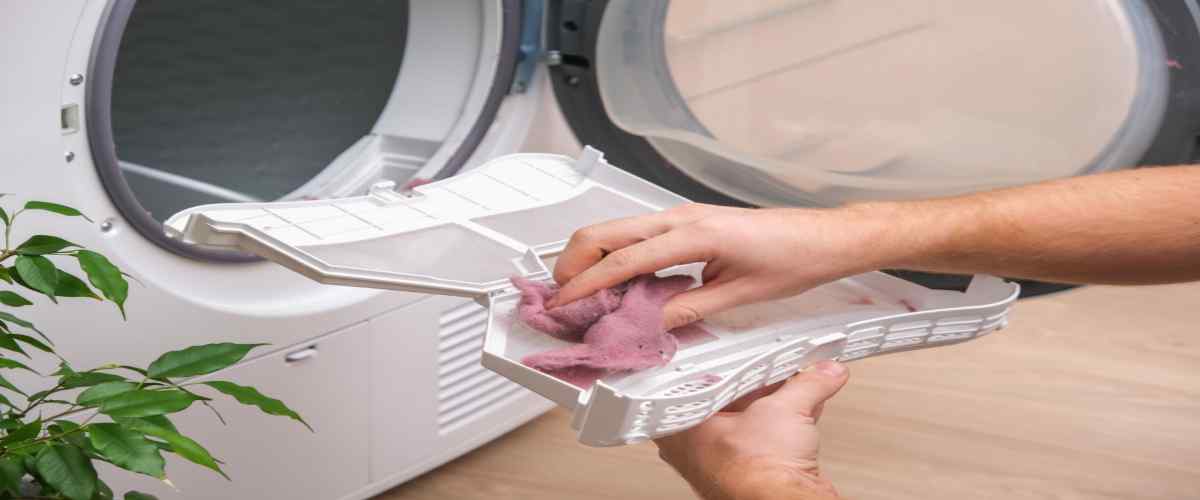
Maintaining your washing machine involves more than just the visible parts. The lint trap, though often overlooked, plays a crucial role in preventing clogs and keeping your machine running smoothly.
- Begin by locating the lint trap, which might be found in different locations depending on your machine's make and model. Check the owner's manual if you're unsure.
- Remove the lint trap and soak it in hot water with a bit of liquid dishwashing soap for about ten minutes. If your lint trap isn't removable, use a small brush along with soapy water to clean it.
- Before replacing the lint trap, take a moment to use a brush to clean out the area where it was attached, especially focusing on crevices where mould and mildew may lurk.
Pro Tip: Regularly inspect and clean the lint trap to ensure it doesn't become a breeding ground for lint and debris, which can impact your machine's performance.
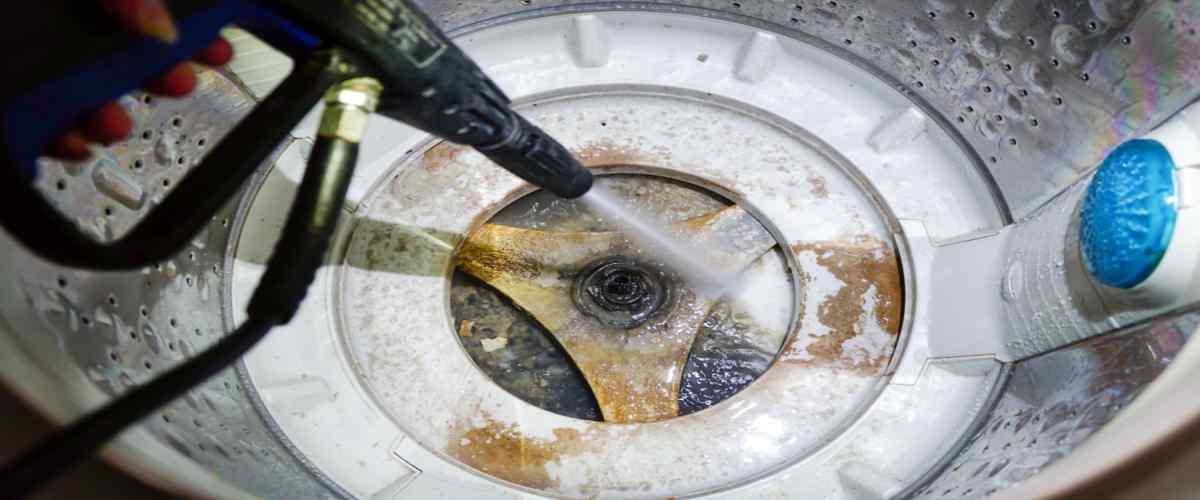
4. Clean the Water Pump Filter

Your washing machine's water pump filter is essential for preventing debris from entering the machine's inner workings. Follow these steps to ensure it's clean and functioning optimally:
- First, make sure your machine is empty and unplugged.
- Locate the water pump filter. For front-load washers, you'll typically find it behind an access door near the bottom front of the machine. Top-load machines may require removing the outer housing to access the filter.
- Remove the filter and check for any small objects that need dislodging, such as coins, keys, or hair.
- Soak the filter in a mixture of hot water and liquid dishwashing soap for ten minutes before replacing it.
Pro Tip: Regularly inspect and clean the water pump filter to prevent blockages and ensure your washing machine continues to drain effectively.
5. Perform Routine Inspections of Hoses and Drum
- Regular inspections and maintenance of your washing machine's hoses and drum are essential for prolonging its lifespan and avoiding costly repairs. Here's how to go about it:
- Inspect hoses for signs of wear and tear, such as bulges, loose fittings, cracks, or leaks. It's advisable to replace hoses every three to five years, or sooner if you notice any damage.
- Since the washer drum can be prone to corrosion, carefully examine it for any exposed or damaged metal. If you spot rust, consider a remedy: add two cups of lemon juice into the washer and run another cycle on the hottest setting. If the rust persists, it may be time to consider investing in a new machine.
Pro Tip: To prevent hose damage and corrosion, avoid overloading your washing machine and use the recommended amount of detergent. Additionally, regularly inspect hoses for any wear and tear, especially near the connections.
How to Clean the Washing Machine Tub?
Cleaning the wash tub of your washing machine is a crucial part of machine maintenance that often gets overlooked. Over time, dirt, grime, and detergent residue can build up inside the drum, leading to unpleasant odours and reduced washing efficiency. Fortunately, you can restore your washing machine's cleanliness and ensure your laundry emerges fresh and odour-free with a few simple steps using common household items.
Cleaning the Wash Tub Using Common Household Items:
To clean the washing machine tub, you won't need any specialised or expensive cleaning products. Instead, you can rely on everyday household items to get the job done effectively. Here's what you'll need:
- White Vinegar: White vinegar is a natural and effective cleaning agent that can help dissolve mineral deposits and soap scum inside the tub.
- Baking Soda: Baking soda acts as a gentle abrasive and deodoriser, making it ideal for scrubbing away stains and odours.
- A Microfiber Cleaning Cloth: A microfiber cloth is perfect for wiping down surfaces and removing residue without leaving lint behind.
- An Old Toothbrush: An old toothbrush can be invaluable for reaching tight spots and scrubbing away grime in hard-to-reach areas.
Step-by-Step Guide for Cleaning the Washing Machine Tub:
Now, let's dive into the step-by-step process of cleaning your washing machine tub:
Step 1: Preparation
Start by ensuring your washing machine is empty. Remove any laundry, including clothes, towels, or other items.
Step 2: Mixing the Cleaning Solution
Pour two cups of white vinegar directly into the drum.
Measure out half a cup of baking soda and set it aside.
Step 3: Run a Wash Cycle
Set your washing machine to the cleaning setting or the hottest and largest load setting available. If your machine lacks a specific cleaning cycle, opt for a regular wash cycle using hot water.
Step 4: Adding Baking Soda
As the washer begins to fill with water, add the half-cup of baking soda directly into the drum.
Step 5: Pausing the Cycle
Pause the washing machine once it's filled with water and allow the cleaning solution to soak for at least 30 minutes. This soaking period allows the vinegar and baking soda to work their magic, breaking down residues and eliminating odours.
Step 6: Resuming the Cycle
After the soaking period, resume the cycle until it completes.
Step 7: Wiping Down the Drum
Once the cycle finishes, use a microfiber cleaning cloth to wipe down the inside of the drum thoroughly. Pay attention to any remaining stains, soap scum, or residue, and use the cloth to scrub them away.
Step 8: Cleaning Hard-to-Reach Areas
For stubborn or hard-to-reach areas, such as the top rim of the drum, crevices, or the detergent dispenser, an old toothbrush can be incredibly helpful. Dip it in the remaining vinegar solution and scrub away any grime.
Step 9: Rinse
To ensure no vinegar or baking soda residue remains, run an additional cycle with plain water. This rinse cycle helps eliminate any lingering odours.
Step 10: Leave the Lid or Door Open
After completing the cleaning process, it's a good practice to leave the lid or door of your washing machine open for a few hours to allow proper ventilation. This helps prevent the growth of mould and mildew and keeps your machine smelling fresh.
By following these simple steps and using common household items, you can keep your washing machine tub clean and in top working condition. Regular cleaning not only ensures your machine performs optimally but also extends its lifespan, saving you money in the long run. So, don't forget to give your washing machine the TLC it deserves to keep your laundry smelling and looking its best.
How to Clean the Washing Machine Door or Lid?

The washing machine door or lid is an often-neglected part of the appliance, yet it plays a crucial role in keeping your laundry clean and fresh. Over time, dirt, soap scum, and residue can accumulate on the door or lid, leading to unpleasant odours and even mould growth. Cleaning this area is essential not only for hygiene but also for the longevity of your machine. In this guide, we'll walk you through a step-by-step cleaning process, addressing dirt and grime effectively to ensure your washing machine remains in top condition.
Addressing Dirt and Grime on the Door or Lid:
Before we delve into the cleaning process, let's understand why cleaning the washing machine door or lid is essential:
- Preventing Mould and Mildew: The rubber gasket around the door is a magnet for lint, hair, and debris. Similarly, the top of the wash tub and the inside lip of the lid can trap residues, creating a breeding ground for mould and mildew.
- Maintaining Freshness: A clean door or lid ensures that no unpleasant odours transfer to your freshly laundered clothes.
- Extended Lifespan: Regular cleaning prevents the buildup of grime that can affect the door's seal and overall performance of your washing machine.
Step-by-Step Cleaning Process:
Here's how to effectively clean the washing machine door or lid:
Step 1: Gather Your Cleaning Supplies
You'll need the following items:
- White Vinegar: This natural cleaner helps dissolve mineral deposits, soap scum, and mildew.
- Baking Soda: Baking soda acts as an abrasive cleaner and deodoriser.
- Microfiber Cloth: Opt for a microfiber cloth to clean and wipe away residue without leaving lint behind.
- Old Toothbrush: An old toothbrush is handy for reaching tight spots and scrubbing away grime.
Step 2: Preparing the Cleaning Solution
Mix equal parts of white vinegar and water in a spray bottle. This solution is gentle yet effective for removing grime and mildew.
Step 3: Spray and Soak
- Spray the vinegar and water solution generously on the rubber gasket around the door or lid. Ensure that you reach all the nooks and crannies where dirt tends to accumulate.
- Allow the solution to soak for a few minutes. This soaking period helps soften and loosen the grime, making it easier to clean.
Step 4: Scrub Away Grime
- Use an old toothbrush to scrub the rubber gasket. Pay special attention to areas with visible mould or mildew.
- For the top of the wash tub and the inside lip of the lid, use the toothbrush to dislodge debris and grime. Apply a bit of pressure where needed to ensure a thorough clean.
Step 5: Wipe Clean
- Take a microfiber cloth and dampen it with clean water. Wipe down the areas you've scrubbed to remove loosened grime and residue.
- Repeat the wiping process until the cloth comes away clean, indicating that you've removed all the dirt and cleaning solution.
Step 6: Final Rinse
- To ensure no vinegar or baking soda residue remains, run a rinse cycle in your washing machine with no clothes inside.
Step 7: Leave the Door or Lid Open
After completing the cleaning process, it's essential to leave the washing machine door or lid open for a few hours to allow proper ventilation. This step helps prevent mould and mildew growth, ensuring your washing machine remains fresh.
Tips for a Thorough Clean:
- Perform this cleaning process regularly, ideally once a month or as needed.
- If mould or mildew is persistent, consider using a stronger cleaner or a specialised washing machine cleaner.
- After each laundry cycle, wipe down the area around the door or lid with a microfiber cloth to prevent the buildup of residues.
By following these steps and maintaining a clean washing machine door or lid, you'll not only enjoy fresher laundry but also extend the life of your valuable appliance. Cleaning this often-neglected area is a small effort that goes a long way in ensuring your washing machine operates efficiently and effectively.
How to Clean Detergent Trays, Washer Parts, and Surfaces?
When it comes to maintaining your washing machine, cleaning the detergent trays, various washer parts, and surfaces often goes overlooked. However, this is a crucial aspect of keeping your machine in optimal condition. Over time, detergent residues, fabric softener, and grime can accumulate in these areas, leading to not only unpleasant odours but also reduced washing efficiency. In this guide, we will emphasize the importance of cleaning removable parts, provide you with easy-to-follow steps for cleaning detergent trays and other components, and offer tips on using common household items for effective cleaning.
Importance of Cleaning Removable Parts:
Cleaning removable parts of your washing machine is essential for several reasons:
- Preventing Clogs: Detergent trays and dispensers can clog if residues are left unchecked. This can affect the proper distribution of detergents, resulting in less effective cleaning.
- Odour Control: Accumulated residues can lead to unpleasant odours in your washing machine, which can transfer to your clothes.
- Maintaining Efficiency: A clean machine operates more efficiently, ensuring that your laundry comes out fresh and clean with each wash.
Steps for Cleaning Detergent Trays and Other Parts:
Here's a step-by-step guide to effectively clean detergent trays, washer parts, and surfaces:
Step 1: Gather Your Supplies
Before you start, gather the following items:
- Warm Water: You'll need warm water to dissolve detergent residues effectively.
- White Vinegar: Vinegar acts as a natural cleaner and deodoriser.
- Microfiber Cloth: A microfiber cloth is ideal for wiping away residues without leaving lint behind.
- Toothbrush: An old toothbrush is excellent for reaching tight spots and scrubbing away grime.
Step 2: Remove and Soak Removable Parts
- Begin by removing any removable parts, such as the detergent tray and fabric softener dispenser. Refer to your machine's manual for guidance on how to do this.
- Fill a basin or sink with warm water and add a cup of white vinegar.
- Submerge the removable parts in the vinegar solution and let them soak for about 15-20 minutes. This soaking will help loosen any built-up residues.
Step 3: Scrub Away Residues
- After soaking, use an old toothbrush to scrub away residues from the detergent trays and dispensers. Pay attention to any stubborn areas where grime may have accumulated.
- For surfaces inside the washing machine, like the drum and the areas around the detergent tray, dampen a microfiber cloth with the vinegar solution and wipe them down thoroughly.
Step 4: Rinse and Dry
- Rinse the detergent trays, dispensers, and other removable parts thoroughly with clean, warm water to remove any remaining vinegar or detergent residues.
- Allow the parts to air dry completely before reassembling them into your washing machine.
Using Household Items for Cleaning:
Cleaning your washing machine doesn't require specialised cleaners. Household items like warm water and white vinegar can be highly effective in removing residues and odours. This eco-friendly approach not only keeps your machine clean but also helps the environment.
By following these steps and making a habit of cleaning detergent trays, washer parts, and surfaces regularly, you'll ensure that your washing machine remains in top condition. Not only will your laundry come out smelling fresh, but your machine will also operate efficiently, saving you both time and energy in the long run. Remember, a little maintenance goes a long way in extending the lifespan of your valuable appliance.
How to Clean the Filter and Agitator?

Cleaning the filter and agitator of your washing machine is a critical step in maintaining its performance and ensuring your laundry comes out fresh and clean every time. Over time, lint, debris, and residue can accumulate in these components, affecting the efficiency of your machine. In this section, we will explain why it's essential to clean the filter and agitator, provide you with a step-by-step guide for removing and cleaning these parts, and detail the soaking and scrubbing process for thorough maintenance.
Explaining the Need to Clean the Filter and Agitator:
Cleaning the filter and agitator is vital for several reasons:
- Preventing Clogs: The filter, often located near the drainage system, collects lint and debris from your laundry. A clogged filter can hinder water drainage, causing potential damage to your machine.
- Ensuring Proper Agitation: The agitator, responsible for moving clothes around during the wash cycle, can accumulate residues that impede its function. A clean agitator ensures efficient washing.
- Extending Machine Life: Regular maintenance, including cleaning the filter and agitator, can extend the lifespan of your washing machine, saving you money on repairs or replacements.
Step-by-Step Guide for Removing and Cleaning:
Follow these steps to effectively clean the filter and agitator:
Step 1: Gather Your Supplies
Before you begin, gather the following supplies:
- Screw Driver: You may need a screwdriver to access and remove the agitator, depending on your washing machine model.
- Warm Water: Warm water is essential for dissolving residues effectively.
- White Vinegar: White vinegar acts as a natural cleaner and helps eliminate odours.
- Microfiber Cloth: A microfiber cloth is ideal for wiping away residues and ensuring a thorough clean.
- Old Toothbrush: An old toothbrush is useful for scrubbing hard-to-reach spots.
Step 2: Removing the Filter and Agitator
- Consult your washing machine's manual to locate the filter and agitator and understand how to remove them. In most cases, you may need to unscrew or gently pry off the agitator cap to access the agitator.
- Once the filter and agitator are accessible, carefully remove them according to the manufacturer's instructions.
Step 3: Soaking and Scrubbing Process
For the Filter:
- Fill a basin or sink with warm water and add a cup of white vinegar.
- Submerge the filter in the vinegar solution and let it soak for approximately 15-20 minutes. This soaking will help loosen any trapped lint and debris.
- After soaking, use an old toothbrush to scrub the filter thoroughly. Pay attention to any stubborn residues.
- Rinse the filter with clean, warm water to remove any remaining vinegar or debris.
For the Agitator:
- If your agitator is removable, soak it in the same warm water and vinegar solution for 15-20 minutes.
- Use an old toothbrush or scrub brush to clean the agitator thoroughly, especially in areas where residues tend to accumulate.
- Rinse the agitator with clean, warm water and ensure it's completely free of vinegar and debris.
Step 4: Reassemble and Test
- Reassemble the filter and agitator according to your washing machine's manual.
- Perform a test wash to ensure that the components are properly reinstalled and functioning correctly.
By regularly cleaning the filter and agitator of your washing machine, you'll maintain its efficiency, prevent clogs, and ensure your laundry receives a thorough cleaning. This simple maintenance routine can prolong the life of your appliance, save you from unexpected repairs, and provide you with consistently fresh and clean clothes. Remember, a little care goes a long way in keeping your washing machine running smoothly.
How to Clean the Filter and Agitator?
A smelly washing machine is not only unpleasant but also a sign of potential issues that need your attention. Over time, residues from detergents, fabric softeners, and moisture can accumulate in your machine, leading to foul odours. Fortunately, there are effective ways to tackle this problem and get your washing machine smelling fresh again.
Addressing the Issue of Smelly Washing Machines:
A smelly washing machine can be attributed to several factors:
- Residue Buildup: Detergent, fabric softener, and lint can accumulate in various parts of your machine, creating a breeding ground for bacteria and mould.
- Moisture Retention: Closing the washing machine door after each use can trap moisture inside, promoting the growth of mildew and mould.
- Infrequent Cleaning: Neglecting regular cleaning and maintenance allows residues to build up, leading to persistent odours.
Step-by-Step Cleaning Process:
Follow these steps to eliminate unpleasant odours from your washing machine:
Step 1: Empty the Machine
Start by ensuring that your washing machine is completely empty. Remove any laundry, including damp clothes or towels.
Step 2: Check for Visible Residues
Inspect the drum, agitator (if applicable), and detergent trays for visible residues. Remove any loose debris, lint, or foreign objects.
Step 3: Cleaning the Drum
Set your washing machine to the highest water level and the hottest water temperature.
Add two cups of distilled white vinegar to the detergent dispenser or directly into the drum. Vinegar acts as a natural disinfectant and helps break down residues.
Run a complete wash cycle without any laundry. This cycle will allow the vinegar to penetrate and clean the interior of the machine.
Step 4: Clean the Detergent Tray
While the vinegar cycle is running, remove the detergent tray (if removable) and soak it in a solution of warm water and vinegar.
Use a small brush or an old toothbrush to scrub away any residues or mould from the detergent tray.
Step 5: Wipe Down the Door and Seal
After the vinegar cycle is complete, dampen a microfiber cloth with vinegar and thoroughly wipe down the door, door seal, and any visible rubber gaskets. Pay special attention to areas with mould or mildew growth.
If you have a top-loading machine, clean the area beneath the lid as well.
Step 6: Run a Second Cycle
Run a second wash cycle with hot water to rinse away any remaining vinegar and residues.
Step 7: Leave the Door Open
After completing the cleaning process, leave the washing machine door open to allow proper ventilation and drying. This prevents moisture buildup and future odours.
Tips for a Thorough Clean
- For persistent odours, you can add baking soda to the vinegar cycle or use specialised washing machine cleaning tablets following the manufacturer's instructions.
- Consider cleaning your washing machine at least once a month or more frequently if you notice lingering odours.
- Avoid overloading your machine, as it can lead to incomplete rinsing and residue buildup.
- If you live in a humid climate, consider using a dehumidifier in your laundry area to reduce moisture levels.
DIY vs Washing Machine Cleaning Service
A clean washing machine not only improves the quality of your laundry but also prolongs the lifespan of your appliance, saving you time and money in the long run. Below is the table for DIY vs washing machine cleaning service:
| Factor | DIY | Professional Service |
| Cost | Low | Moderate to high |
| Tools required | Vinegar, baking soda, soft cloth, hot water | Industrial descalers/tools |
| Time required | 30-60 minutes | 45-90 minutes |
| Deepest clean | Moderate | High |
Best Washing Machine Cleaners in India
Maintaining a fresh and odour-free washing machine is essential for ensuring clean and hygienic laundry. A smelly washing machine is not only unpleasant but can also affect the quality of your clothes. Below are the deep clean washing machine cleaners in India:
1. Dettol washing machine cleaner
2. Bosch washing machine cleaner
3. Atomic washing machine cleaner
4. Klenzmo washing machine cleaner
5. TCL washing machine cleaner
How Often Should You Deep Clean Your Washing Machine?
While your washing machine is built to clean your clothes, it also needs regular cleaning to maintain peak performance. Below is the table on how often to deep clean your washing machine:
| Usage Type / Condition | Recommended Frequency |
| Normal household | Every 1–2 months |
| Heavy usage | Once every 3–4 weeks |
| Hard water area | Once a month |
| Using self-clean/tub clean cycle | Every 2–3 months with manual assist |
| Low usage | Once every 3 months |
| Visible mold/odour issues | Immediately, then monthly |
| Post monsoon/rainy season | Once during season + after |
Why Choose NoBroker Cleaning Services?
Our expert cleaners are well-equipped to handle deep cleaning washing machine tasks and more. Here are some key benefits of choosing NoBroker cleaning services:
- Expertise: Our cleaners are skilled professionals with years of experience, ensuring top-notch service.
- Convenience: Schedule a cleaning service at your convenience, and we'll take care of the rest.
- Quality Products: We use high-quality cleaning products and equipment for the best results.
- Affordability: Enjoy cost-effective cleaning services without compromising on quality.
- Satisfaction Guarantee: We strive for your complete satisfaction, and if you're not happy, we'll make it right.
Book Your Home Cleaning Services with NoBroker
Don't let a smelly washing machine affect your laundry experience. Take the first step towards a cleaner and fresher home by booking NoBroker's cleaning services today. Whether it's a deep clean washing machine service or a comprehensive home cleaning, we've got you covered. Enjoy a more hygienic and pleasant living space with NoBroker cleaning services.
Book your cleaning service now and experience the NoBroker difference!
Frequently Asked Questions
Ans: The IFB deep clean washing machine is a specialised model designed for deep cleaning laundry. It stands out from regular washing machines with its advanced cleaning technology, including features like Aqua Energie, Aqua Spa, and a dedicated Drum Lamp.
Ans: Start by running an empty hot water cycle with vinegar to remove build-up. Next, scrub the interior with baking soda to eliminate odours and stains. Don't forget to clean the exterior and any removable parts for a thorough clean. Repeat this process every few months to keep your washing machine in top shape.
Ans: Start by removing them from the machine. Soak them in a mixture of hot water and liquid dishwashing soap for about ten minutes. Then, use a brush to scrub away any grime or residue. Rinse thoroughly, dry them completely, and reassemble them in the washing machine.
Ans: Automatic washing machine deep cleaning is a thorough maintenance process that involves cleaning all the nooks and crannies of your washing machine to eliminate dirt, grime, and odours. It includes cleaning the drum, door gasket, lint trap, and water pump filter.
Ans: It's recommended to clean your fully automatic washing machine at least once every two to three months to maintain optimal performance and prevent unpleasant odours. However, if you notice persistent odours or issues with your laundry, consider more frequent cleaning or deep cleaning as necessary.
Ans: First, unplug the machine for safety. Then, use a bucket or a wet-dry vacuum to drain water from the drum, hoses, and pump, preparing it for a clean and dry deep cleaning.
Recommended Reading
Deep Clean Your Washing Machine: Step-by-Step Guide & Tips
January 31, 2025
20461+ views

Top 10 Plumbing Service Apps in 2026
January 31, 2025
15424+ views
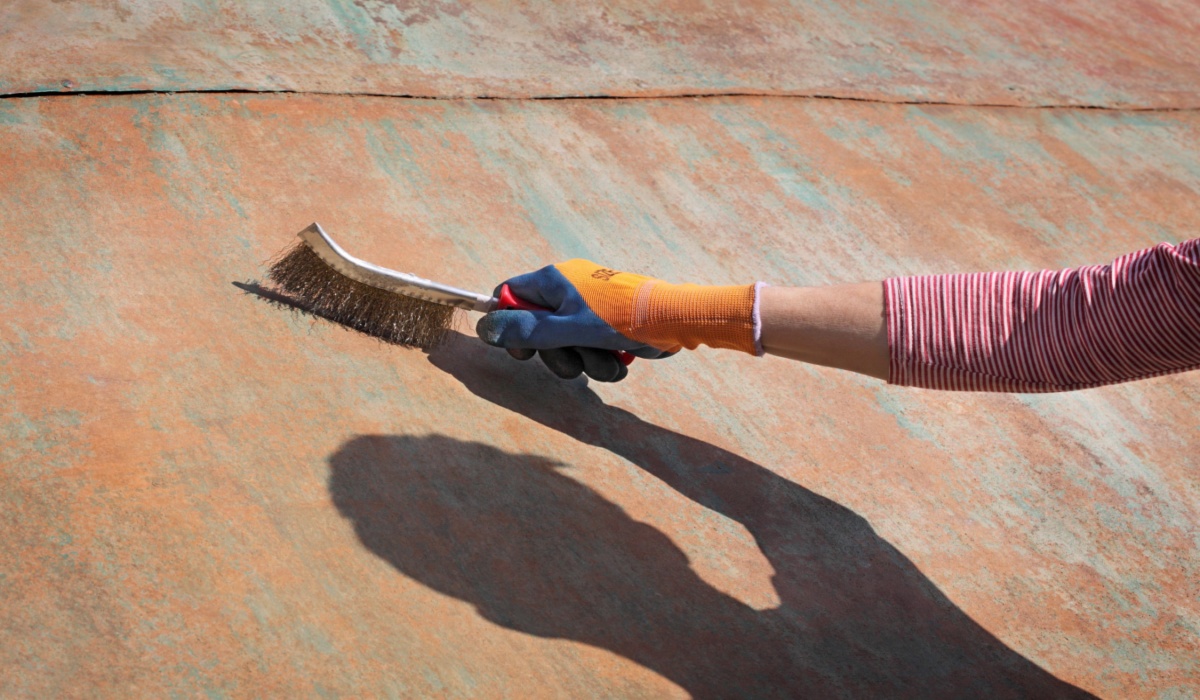
How to Remove Rust from Iron: Step-by-Step Guide for Restoring Your Iron Items in 2026
January 31, 2025
7052+ views
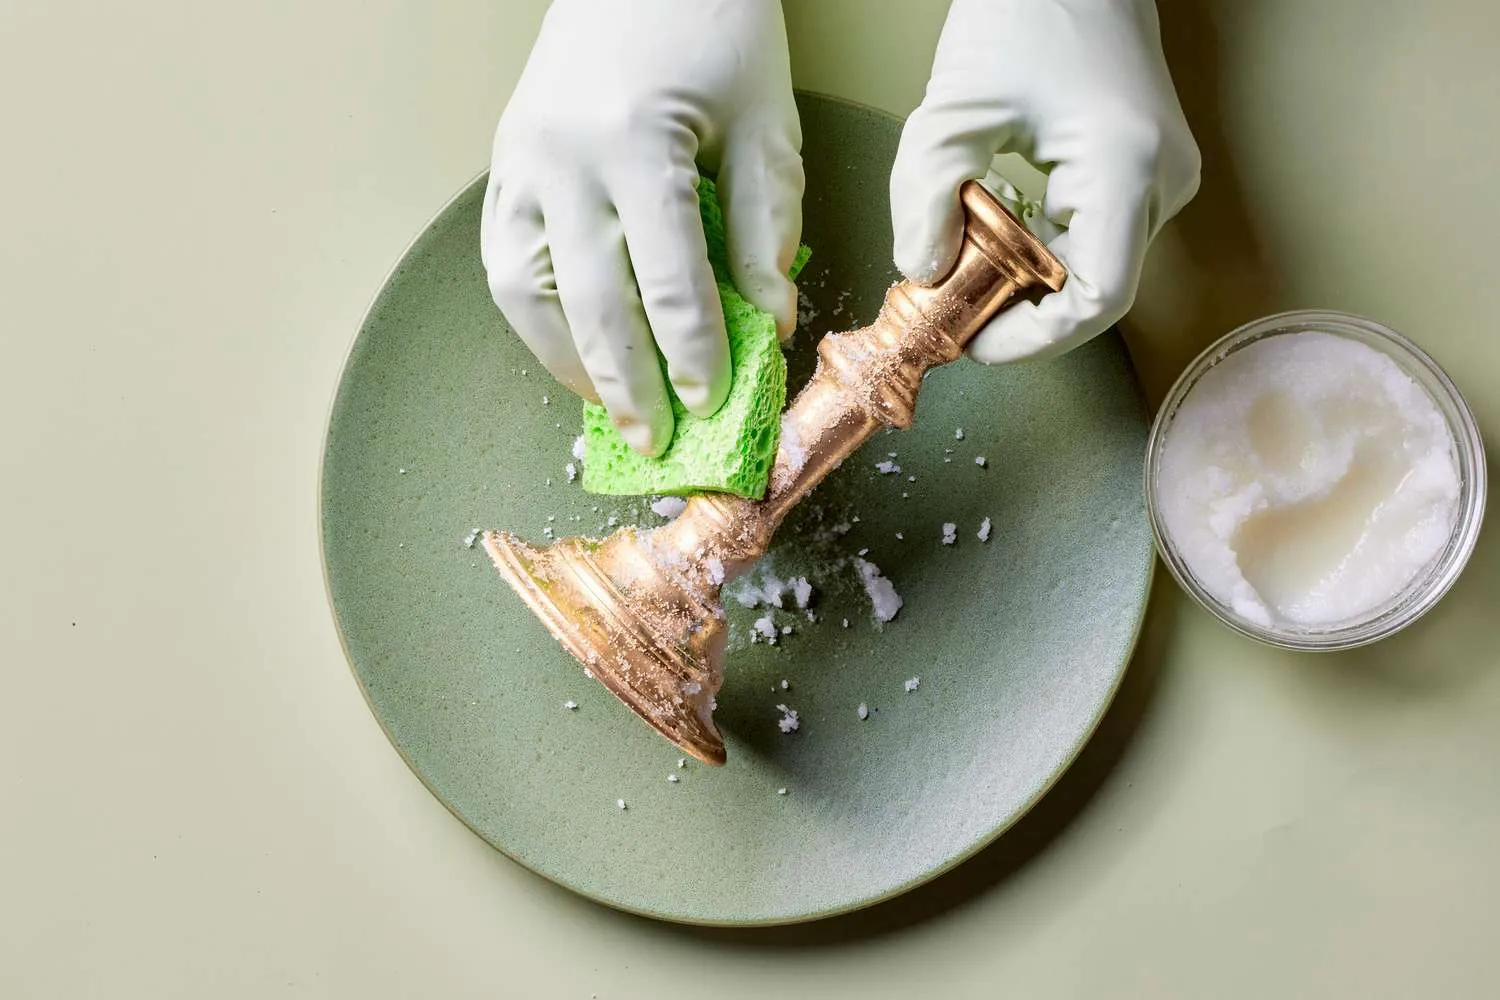
How to Clean Brass Items Simple Steps for Shine and Remove Tarnish in 2026
January 31, 2025
6685+ views
Garage Cleaning Guide: Method, Tips and Tricks
January 31, 2025
4986+ views
Loved what you read? Share it with others!
NoBroker Easy Cleaning Tips Testimonials
Good
Wonder you
Looking good
Good condition
Extremely satisfied with the cleaning service, the team was careful, thorough, and really attentive to details. My home feels spotless and well taken care of.
Nice
Nice
The cleaners were thorough, efficient, and did a fantastic job.
The cleaners were thorough, efficient, and did a fantastic job.
The cleaners were thorough, efficient, and did a fantastic job.
One of the best company
Best work 💝
Wonderful 😊
Provide good and best services 👍
Nice!!
Great experience 😁
Good Place
Very good experience
Excellent
Suparr
Good
Awesome
My goods were delivered on time, as promised, with careful handling.
NoBroker Movers made my relocation stress-free and seamless.
The service was reliable, with attention to detail and a commitment to quality.
My goods were delivered on time, as promised, with careful handling.
NoBroker Movers provided a smooth and stress-free relocation experience.
Im using their Bathroom subscription plan from past 2 years and their services are very good.
Booked full house cleaning for Ugadi, they were on time and completed work very neatly Highly recommended !!
Professional and hustle free services
Took full home cleaning. They did an amazing job!
Most Viewed Articles

List of the Best Home Cleaning Apps: Book Home Cleaning Services for Daily and Deep Cleaning
January 31, 2025
24439+ views
Deep Clean Your Washing Machine: Step-by-Step Guide & Tips
January 31, 2025
20461+ views

Diwali Cleaning Tips and Guide: Make Your Home Shine for the Festival in 2026
January 31, 2025
18164+ views

Top 10 Tile Cleaner Liquids with Prices in India for 2026
February 23, 2025
17329+ views
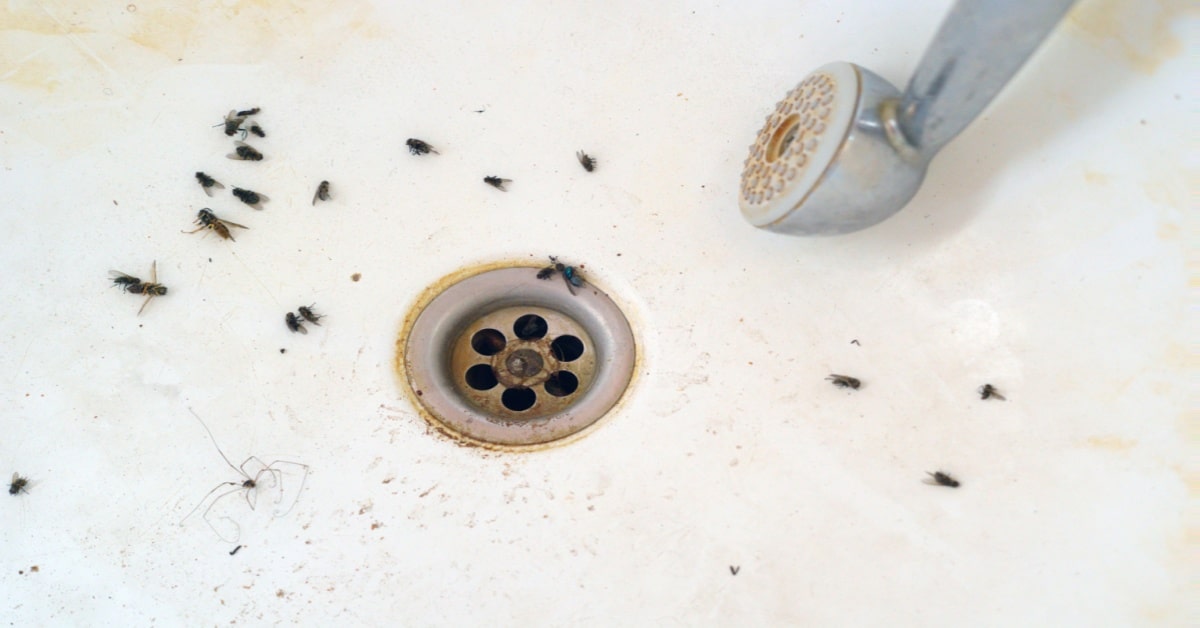
How to Get Rid of Bathroom Flies: 8 Quick Methods
January 31, 2025
17021+ views
 Author
Recent blogs in
How to Remove Ink Stains From Clothes: Methods and Fabric-Specific Solutions
January 9, 2026 by Vivek Mishra
How to Remove Yellow Stains From White Clothes: 6 Effective Methods to Remove
January 9, 2026 by Krishnanunni H M
How to Clean Non Stick Cookware Safely Without Damaging the Coating in 2026
January 7, 2026 by Siri Hegde K
Complete Deep Cleaning Checklist for Every Room in Your Home 2026
December 23, 2025 by Krishnanunni H M
Ultimate Daily Cleaning Checklist by Room for Easy Home Maintenance
December 17, 2025 by Kruthi


 Full RM + FRM support

Join the conversation!