Lights can instantly transform your space from meh to something magical. But if you want to fancy them up a bit you can try some of our DIY lighting ideas.
Try this simple facelift for those boring fairy lights and you are ready to use them in your living spaces, outdoor, bedroom or anywhere.
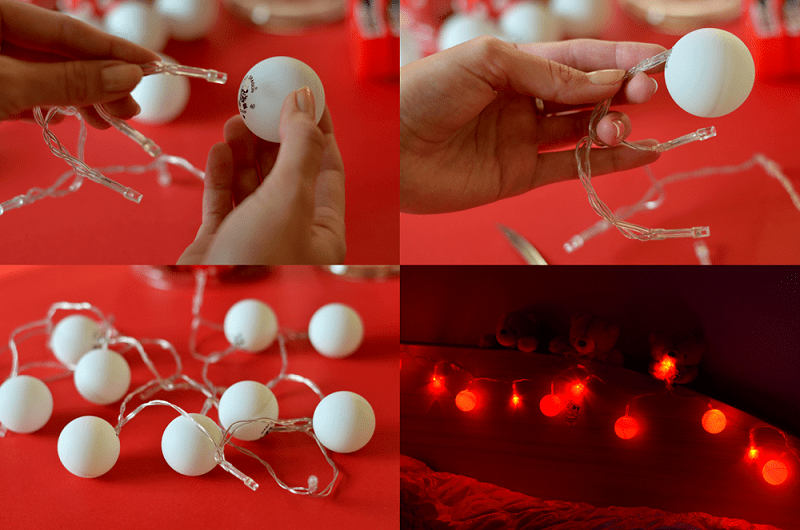
What you need: A string of fairy lights, table tennis balls, paint (optional), cutter
Recommended Reading
Steps:
1. Place the string of lights on a flat surface. Count the number of lights.
2. The number of lights must correspond with the number of table tennis balls you buy.
3. At this point, you could decide if you want to use white ones or prefer coloured ones. You could either fairy lights of a colour your choice or paint the balls. We suggest glass paints for the balls as they are translucent and not opaque.
4. Now, create a small slit in each ball and fit a fairy light each into it.
5. Keep doing this until you have every light covered with a ball.
6. Now, go ahead and drape the string of lights, watch them create a lovely soft lighting.

DIY String lampshade
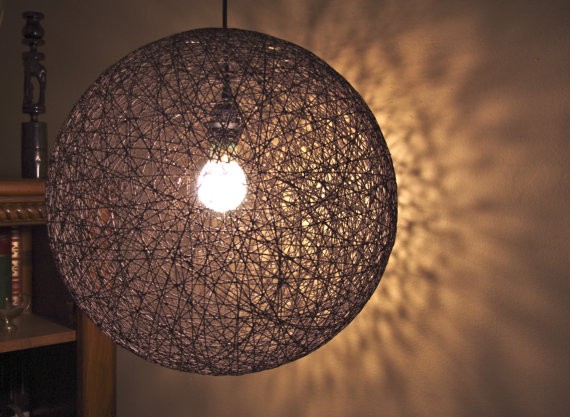
Here’s a way to create your own pendant or drop lamp. You could use it in a dining space, as a reading lamp above your bed, or to decorate a corner in your living room. With just a few simple easily available things, you can create a beautiful lamp. What you need: a balloon, string, corn starch, craft glue, white (or other colours) acrylic paint.
Steps:
1. Blow the balloon to a moderate size so it stays round and doesn’t become oblong. Use a permanent marker to create a small circle at the top, just the right size to fit in a bulb and holder.
2. Mix the cornstarch and craft glue in a bowl. You could add in the white paint at this stage if you are using a tin. If using a spray bottle, wait until later.
3. Now, let the balloon hang at an accessible height. Tie it up to a rod and support it between two chairs.
4. Dip the thread in the mixture and start draping it around the balloon in a haphazard manner. Make sure you avoid getting the string on the area marked out for the light fitting. First, drape tightly and then loosely around to form a criss-cross pattern. How much thread you drape depends entirely on the final result you want.
5. Once fully draped, let the balloon dry overnight.
6. If you are using spray paint, paint at this stage and let dry.
7. Once done, pop the balloon, your lampshade is ready for us

NoBroker is here to help you make your home look it's best. If you're on the look-out for a new home, visit our site today!


