17
Cleaning
comment

How to Clean Kitchen Exhaust Fan Properly?

Your kitchen exhaust fan, often an unsung hero, works diligently to ensure the air in your cooking space remains fresh, clean, and devoid of lingering odours. Yet, just like any other essential appliance, your exhaust fan demands regular attention to maintain its effectiveness and longevity. 

How to Clean a Kitchen Exhaust Fan

Things we covered for you

+

In this ultimate guide, we’ll walk you through how to clean a kitchen exhaust fan, ensuring it continues to serve you at its best, and maintaining a safe and pleasant culinary environment. Whether you’re a novice in the kitchen or a seasoned chef, this guide will provide the insights and tips you need to keep your exhaust system in top shape. Let’s embark on this journey to breathe easier and cook better!

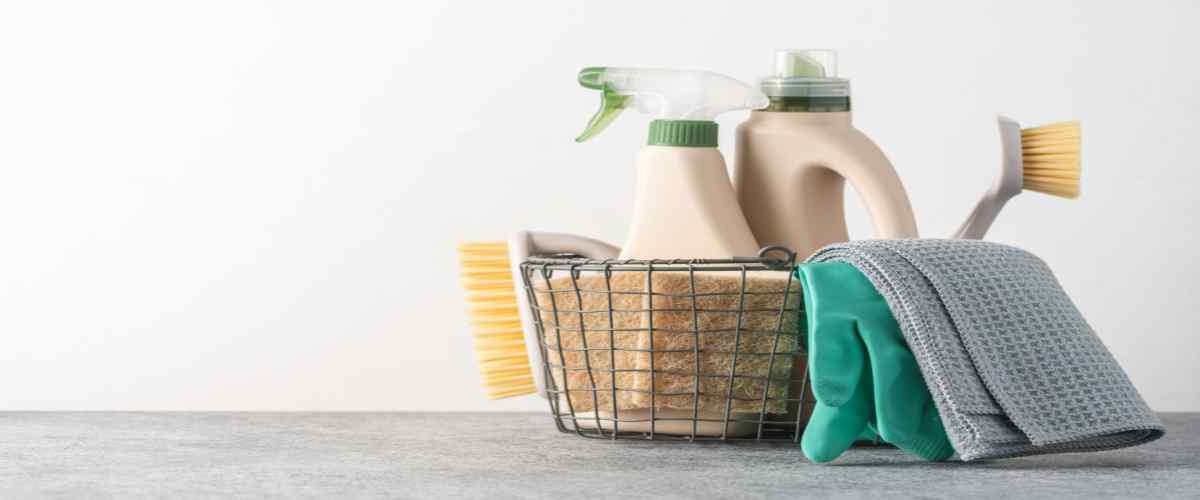
Things Required to Clean Kitchen Exhaust Fan

How to Clean Kitchen Exhaust Fan
Essential tools for a clean and efficient kitchen exhaust fan.

Cleaning the kitchen exhaust fan is essential to maintain a healthy and smoke-free environment in your kitchen. Over time, grease, dirt, and other particles can accumulate on the fan and its filters, leading to decreased performance and potentially posing a fire hazard. 

Regularly conducting a thorough kitchen extractor fan cleaning ensures your kitchen remains safe and your fan operates efficiently. Here’s what you’ll need:

CategoryItems/Description
Safety GearGloves: Protect hands from grease and dirtSafety goggles: Shield eyes from dust or debris
Cleaning AgentsDishwashing liquid or degreaser: Break down accumulated greaseBaking soda: Natural cleaning agentVinegar: Cuts grease and deodorizes
Tools & SuppliesScrewdriver: Remove exhaust fan cover or grillSoft brush or old toothbrush: Scrub hard-to-reach areasSponge or microfiber cloth: Wipe and cleanBucket or basin: Mix cleaning solution/rinse partsWarm water: Dissolve grease and grim

Step-by-Step Guide: How to Clean Kitchen Exhaust Fan Grease

How to Clean Kitchen Exhaust Fan
Say goodbye to greasy hassles! Learn the easy way to clean your kitchen exhaust fan.

Cleaning the grease from your kitchen exhaust fan is crucial to maintaining proper ventilation and a healthy cooking environment. Over time, the exhaust fan accumulates grease and oil, reducing its efficiency and posing potential fire risks. 
Read: How to Clean a Toilet ? A Detailed Guide


Book Best Packers & Movers with Best Price, Free Cancellation, Dedicated Move Manager

Get Rental Agreement With Doorstep Delivery, Super Quick & Easy

This is third

This is third

This is fourth

This is fourth

This is fifth

This is fifth

This is six

This is six

This is seven

This is seven

This is eight

This is eight


Wondering how to clean kitchen exhaust fan grease? Here’s a comprehensive guide to help you through the process using some effective and proven methods:

1. Preparation: Ensure the exhaust fan is turned off and unplugged. Wear protective gloves and safety goggles for protection.

How to Clean Kitchen Exhaust Fan
Preparation

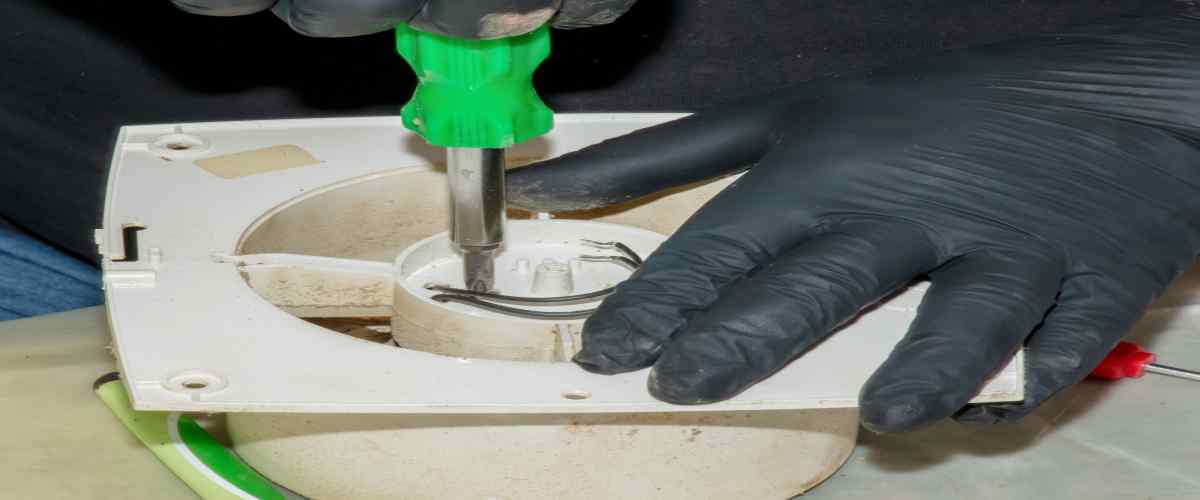
2. Remove the Exhaust Fan Filter: Use a screwdriver to remove the exhaust fan filter. It’s an essential step in understanding how to clean kitchen exhaust fan filters.

How to Clean Kitchen Exhaust Fan
Remove the Exhaust Fan Filter

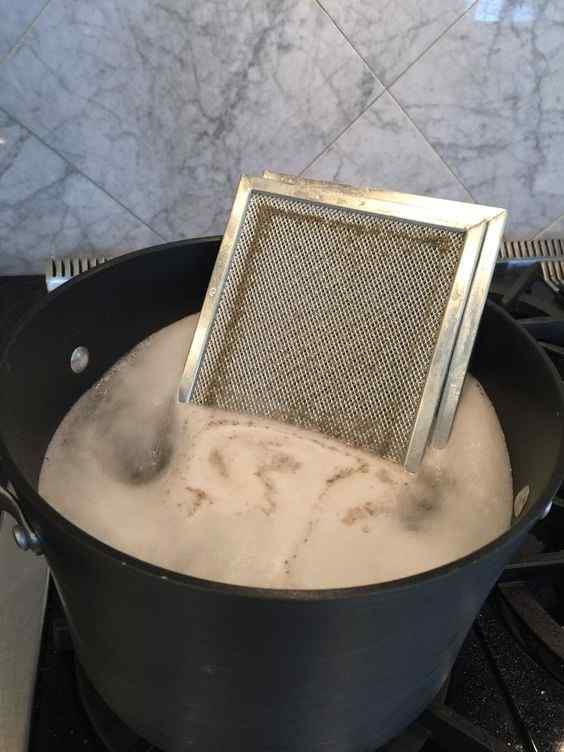
3. Soaking the Filter: Fill a basin with warm water and a quality degreaser or your chosen kitchen exhaust cleaning chemicals. Allow the filter to soak for a minimum of one hour.

How to Clean Kitchen Exhaust Fan
(source: pinterest) Soaking the Filter

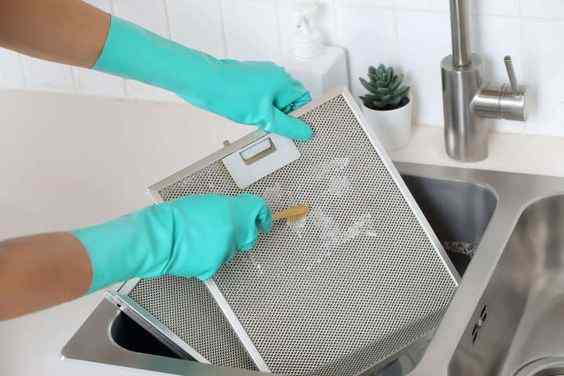
4. Scrubbing the Filter: After soaking, scrub away the grease and dirt using a brush. For stubborn grease spots, sprinkle some baking soda and scrub.

How to Clean Kitchen Exhaust Fan
(Source: pinterest) Scrubbing the Filter

5. Rinse and Dry: Rinse the filter under running water to remove all cleaning solution residues. You can either let it air dry or gently pat it dry using a clean cloth.

How to Clean Kitchen Exhaust Fan
Rinse and Dry

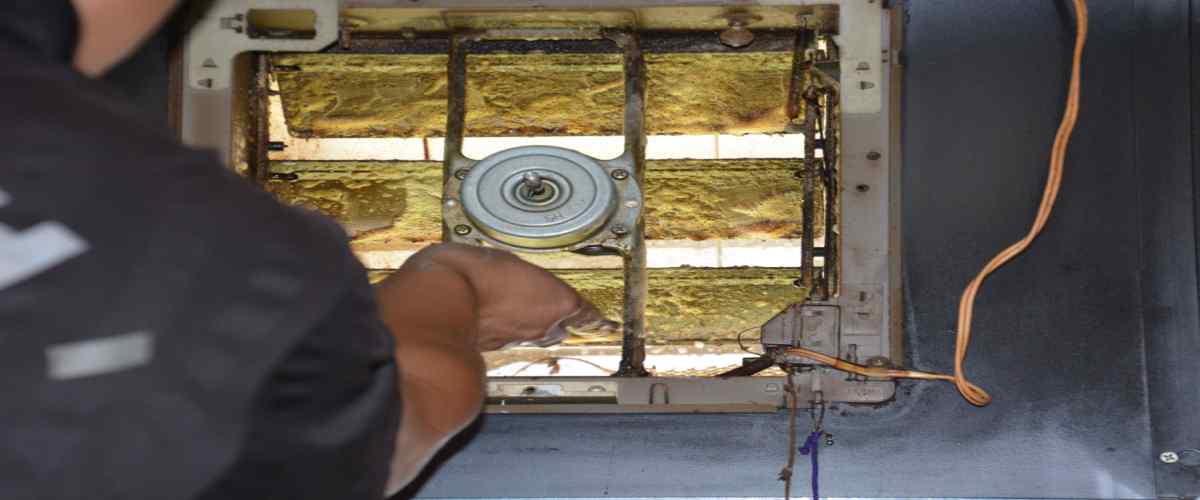
6. Cleaning the Exhaust Fan: To remove oil from the exhaust fan blades and inner parts, wipe with a cloth soaked in a degreaser mixture. For thick grease areas, use a soft brush.

How to Clean Kitchen Exhaust Fan
Cleaning the Exhaust Fan

7. Reassemble the Exhaust Fan: Once everything is clean and dry, put the fan back together, ensuring all parts are secure.

How to Clean Kitchen Exhaust Fan
Reassemble the Exhaust Fan

How to Clean the Exhaust Fan Without Removing It?

How to Clean Kitchen Exhaust Fan
Simplify kitchen chores: Cleaning exhaust fan in the kitchen without removing it made easy!

Discover practical kitchen cleaning tips to maintain your exhaust fan’s efficiency without the hassle of removing it. Follow these simple steps to ensure a clean and safe kitchen environment.
Read: Deep Clean Your Washing Machine: Step-by-Step Guide & Tips

1. Safety First: Ensure the exhaust fan or range hood is turned off. Unplug the unit from the electrical outlet for safety during cleaning.

2. Remove the Filter: Most kitchen exhaust fans come with removable filters. Gently slide or pop out the filter.

3. Soak the Filter: Fill your sink or a large basin with warm water and add a few drops of dish soap or degreaser. Place the filter in the soapy water and let it soak for 10-15 minutes.

4. Scrub the Filter: After soaking, use the old toothbrush or sponge to scrub the filter gently. Pay attention to areas with thick grease or grime buildup.

5. Rinse and Dry: Thoroughly rinse the filter under running water. Shake off excess water and leave it to air dry completely before reinserting it.

6. Clean the Fan Blades and Interior: If your exhaust fan has visible blades or an internal fan, clean them gently using a cloth dampened with soapy water. Ensure not to let water drip into the motor. For hard-to-reach areas, the old toothbrush can be helpful.

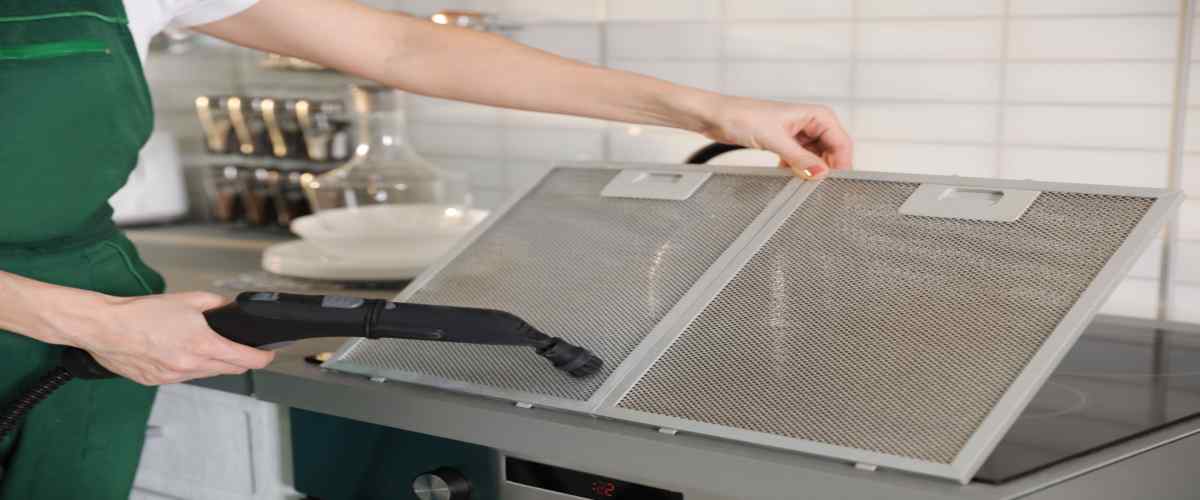
7. Vacuum the Exterior: Using the brush attachment on your vacuum, gently vacuum the exterior of the exhaust fan to remove dust and cobwebs.
Read: Best Homemade Tile Cleaner Recipes for Radiant Tiles

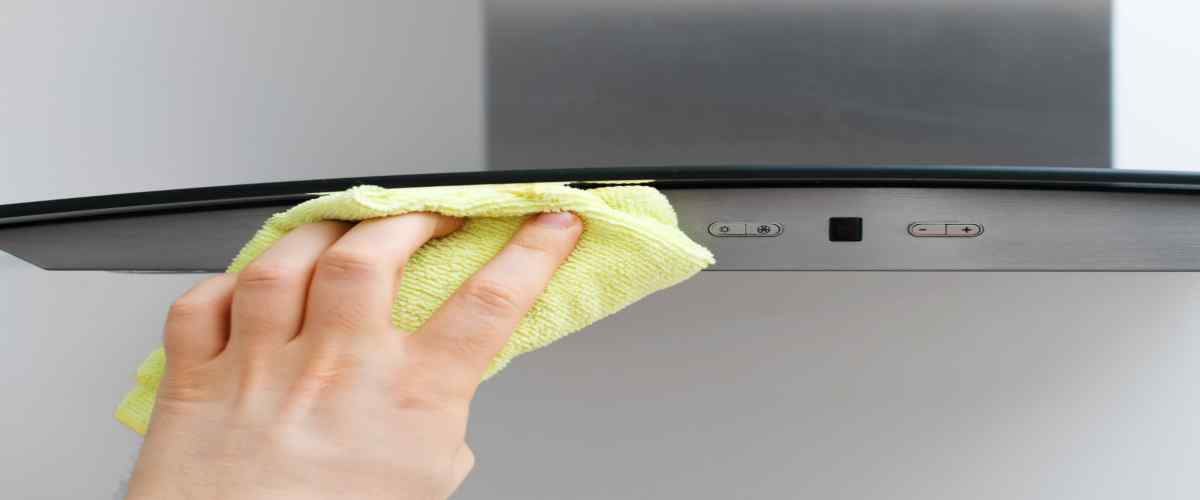
8. Wipe Down the Exterior: Dampen a cloth with soapy water and wring out excess moisture. Wipe down the exterior of the exhaust fan to remove grease and dirt. Then, using a dry cloth or paper towel, dry off any remaining moisture.

9. Reassemble the Unit: Once the filter is completely dry, place it back into the exhaust fan. Reconnect the unit to the electrical socket.

10. Test: Turn on the exhaust fan to ensure it’s working properly.

Remember to clean your kitchen exhaust fan regularly to maintain its efficiency and prolong its lifespan. Monthly cleaning or at least once every three months is recommended, depending on how frequently you cook.

DIY Kitchen Exhaust Fan Cleaning Solutions Using Household Items

How to Clean Kitchen Exhaust Fan
Sparkling results with homemade kitchen exhaust cleaning chemicals!

Cleaning your kitchen exhaust fan is an essential task to maintain good indoor air quality and prevent fire hazards. You can create effective DIY exhaust fan cleaning solutions using common homemade cleaning aids. Here are some methods to clean your kitchen exhaust fan at your home:

Before you start: Make sure to turn off the power to your kitchen exhaust fan and, if possible, remove the filters or cover for easier access and cleaning.

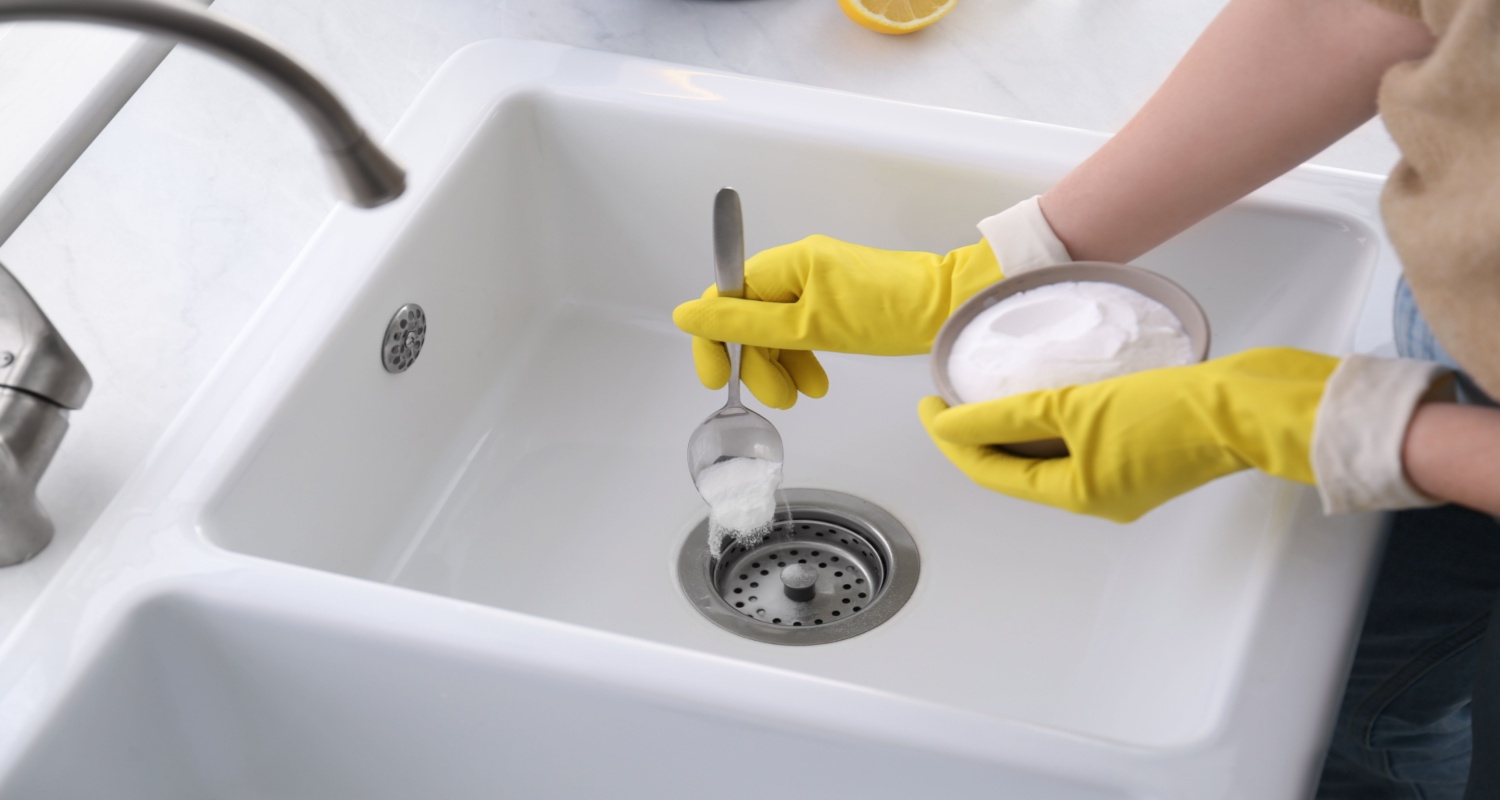
1. Baking Soda and Vinegar Solution:

  1. Mix 1/2 cup of baking soda with 1/4 cup of white vinegar to create a foaming cleaning solution.
  2. Apply the mixture to the fan blades, housing, and filters using a sponge or cloth.
  3. Let it sit for 10-15 minutes to break down grease and grime.
  4. Scrub the surfaces gently and wipe them clean with a damp cloth.
  5. Rinse the filters with water and let them dry completely before reinstalling.

2. Dish Soap and Water:

  1. Fill a basin or sink with warm, soapy water (use mild dish soap).
  2. Remove the filters and soak them in the soapy water.
  3. Wipe down the fan blades, housing, and other surfaces with a sponge or cloth soaked in soapy water.
  4. Thoroughly rinse the filters and let them dry completely before reinserting them.

3. Lemon and Salt Solution:

  1. Slice a lemon in two and scatter some salt over the cut surface.
  2. Use the lemon as a scrubber for the fan blades and surfaces.
  3. The natural acidity of the lemon helps break down grease, while the salt acts as an abrasive cleaner.
  4. Wipe away the residue with a damp cloth and rinse the filters.

4. Ammonia and Water (for stubborn grease):

  1. Only use this method if other methods haven’t worked, and ensure proper ventilation.
  2. Dilute 1/4 cup of ammonia in a gallon of water.
  3. Apply the solution to the exhaust fan blades and surfaces with a sponge or cloth.
  4. Allow it to sit for a few minutes to loosen stubborn grease.
  5. Cleanse by wiping with a moistened fabric and ensure a thorough rinse afterwards.

NoBroker Cleaning Services – Your Trusted Partner for a Pristine Kitchen!

In this blog, we have explored comprehensive steps on how to clean a kitchen exhaust fan, ensuring a smooth, efficient, and safe cooking environment. However, if you find yourself short on time, expertise, or the necessary tools to give your exhaust fan the cleaning it deserves, don’t hesitate to reach out to NoBroker Cleaning Services. Our dedicated team of professionals is ready to take the burden off your shoulders and ensure your kitchen exhaust fan is in pristine condition, allowing you to cook with peace of mind.
Read: How to Clean Mould: Expert Tips for a Mould-Free Home

For a hassle-free kitchen exhaust fan cleaning experience, contact NoBroker Cleaning Services today. Your kitchen and your family’s well-being deserve nothing less than the best!

Frequently Asked Questions

Q1. How often should I clean my kitchen exhaust?

A: The frequency with which you should clean your kitchen exhaust largely depends on how often you cook and what type of cooking you do. As a general guideline:
1) For light cooking (e.g., boiling, steaming): every 3-6 months.
2) For regular/moderate cooking: every 2-3 months.
3) For heavy cooking (e.g., frying, grilling): every month.

Q2. Are there any professional kitchen exhaust cleaning services in India?

A: Absolutely! In India, NoBroker offers a wide range of home services, and you can often find professional kitchen exhaust cleaning among them. NoBroker can help you with verified service providers, ensuring safe and effective cleaning for your kitchen exhaust system. 

Q3. Is it safe to use chemicals to clean your kitchen exhaust?

A: If you decide to use chemicals, always opt for kitchen-safe, non-toxic, and eco-friendly solutions. Read the product label and follow the manufacturer’s guidelines closely. Some chemicals can corrode or damage the exhaust if not suitable. It’s crucial to rinse thoroughly after cleaning to ensure no chemical residues remain, which could contaminate the air when the exhaust is used.

Q4. How do I know if my kitchen exhaust fan needs cleaning?

A: Indications that your kitchen exhaust fan might need cleaning include:
1) Reduced airflow or weaker suction.
2) Accumulation of grease or grime when you touch the surface or the filters.
3) A noticeable increase in kitchen odours.
4) The exhaust makes more noise than usual.
5) Visible smoke or haze in the kitchen even with the fan on.

Q5. Will cleaning my kitchen exhaust help reduce cooking odours?

A: Yes, cleaning your kitchen exhaust regularly will help in reducing cooking odours. A clean exhaust system works more efficiently, removing cooking fumes and odours effectively. Accumulated grease and grime can trap and hold odours, so regular cleaning ensures these smells are eliminated.

Q6. Can clogged kitchen exhausts lead to increased electricity bills?

A: Yes, a clogged kitchen exhaust can lead to increased electricity bills. When the exhaust or its filters are clogged, the motor needs to work harder to expel the air, leading to increased energy consumption. A clean and well-maintained exhaust system operates more efficiently, conserving energy and reducing electricity costs.

Q7. How often should I perform range hood filter cleaning?

A: For optimal performance, it’s recommended to clean your range hood filter every three to four months, or more frequently if you cook often

Q8: How Often Kitchen Vent Should Be Cleaned?

A: Kitchen vent cleaning should ideally be performed every 3-6 months to ensure optimal airflow and prevent grease buildup.

Q9. What is a residential range hood cleaning service?

A: A residential range hood cleaning service specializes in thoroughly cleaning the exhaust system of kitchen range hoods in homes, removing grease and grime buildup for enhanced safety and efficiency.

Contact Us


Subscribe

srivalli susarla

Srivalli is a finance wizard with a refreshing voice in the often-stodgy world of personal finance and investment. An ardent admirer of literature, she brings a deep understanding of language and storytelling to her writing. Srivalli's Blogs on NoBroker brings a unique perspective to her writing on the Indian realty sector as a writer for the NoBroker Blog.

Ultimate Guide to Cleaning Kitchen Cabinets Like a Pro

Ultimate Guide to Cleaning Kitchen Cabinets Like a Pro

The kitchen is the centre of your home. It deserves nothing less than spotless surfaces and pristine cabinets. However, let’s be honest: preparing food can leave its traces, and dirt can build up over time, turning those once-shiny cabinets into a sight that’s less than appealing. So, the question arises: how to clean kitchen cabinets? That is where this article comes in to help. 

This article will give you the knowledge and tools for cleaning kitchen cabinets effectively, bringing back their lustre, and restoring order to your kitchen domain. Whether you’re dealing with oily splashes, sticky handprints, or persistent dust particles, this article will be helpful to you. So, get your microfiber clothes and get ready because it’s time to reveal the shining potential of your kitchen cabinets!

When Should You Clean Kitchen Cabinets?

Cleaning inside kitchen cabinets is essential to maintaining a healthy and hygienic kitchen environment. The frequency of cleaning depends on various factors such as usage, location, and the type of material the cabinets are made of. Some of the situations when you should consider cleaning your kitchen cabinets:

1. Regular Maintenance 

Regular cleaning is necessary to keep your cabinets looking their best and prevent dust and grime build-up. A monthly wipe-down with a damp cloth and mild detergent is usually sufficient.

2. After Cooking

If you have been cooking and notice splatters of grease or food particles on your cabinets, cleaning them immediately is best. This prevents stains from setting in and becoming difficult to remove later.

3. Seasonal Deep Cleaning

A thorough, deep cleaning of your kitchen cabinets is recommended at least once or twice a year. This involves removing everything from the cabinets, cleaning the interior and exterior surfaces, and neatly arranging your items.

4. Before Pest Control

Clean your cabinets beforehand if you plan to have a pest control treatment in your kitchen. This ensures the treatment is more effective and reduces the chances of pests returning.

5. When Moving in or out

Cleaning the kitchen cabinets is a good practice when moving into a new home or out of your current one. This ensures that the cabinets are hygienic and ready for use by the next occupant.

How to Clean Kitchen Cabinets That Are Stained?

Cleaning stained kitchen cabinets can be challenging, but with suitable materials and elbow grease, you can get them to look new. Follow these simple steps:

Step 1: Prepare a Cleaning Solution

This is your first step in the cleaning process. You’ll need to mix a few drops of mild dish soap with warm water. The soap will help cut through any grease or grime on the cabinets, while the warm water will help dissolve the soap and make it more effective. Ensure the water is not too hot, as it can warp the wood.

Step 2: Wipe Down the Cabinets

After preparing your cleaning solution, dip a microfiber cloth or sponge into it and wring it out well. You don’t want the cloth or sponge dripping wet, just damp. Wipe down the cabinets, paying particular attention to stained areas. The microfiber cloth or sponge is gentle enough not to scratch the wood but will still effectively clean the surface.

Step 3: Tackle Tough Stains

If you notice that some stains are not coming off with the cleaning solution, you can use a paste made from baking soda and water. Baking soda is a gentle abrasive that can help to lift stubborn stains. Apply this paste to the stains and let it sit for a few minutes, then scrub gently with a cloth or sponge. Be careful not to scrub too hard, as you could scratch the wood. This is the right approach to the question: how to clean kitchen cabinets with baking soda.

Step 4: Rinse and Dry

After you’ve cleaned the cabinets, it’s important to rinse them off with a cloth dampened with clean water. This will remove any soap or baking soda residue that could leave a film on the cabinets. After rinsing, dry the cabinets thoroughly with a clean, dry cloth. This will prevent water spots and streaks from forming.

Step 5: Deodorise

If your cabinets have a lingering smell, you can deodorise them with equal water and vinegar. Vinegar is a natural deodoriser that can help to neutralise odours. Wipe down the cabinets with this solution, then dry thoroughly.

Step 6: Polish (Optional)

If you want to add shine to your cabinets, you can polish them with olive oil. Olive oil is a natural conditioner for wood and can help to restore its shine. Apply a small amount to a cloth and buff the cabinets until they shine. Be sure to use only a little oil, which can make the cabinets feel greasy.

How to Clean Kitchen Cabinets That Are Painted?

Now, you want to know how to clean painted kitchen cabinets, right? Cleaning painted kitchen cabinets is a delicate task, as the wrong cleaning materials could damage the paint. However, with the right approach, you can keep your cabinets looking fresh and clean. Follow these steps:

Step 1: Gather Your Materials 

Before cleaning, gather all the necessary materials. This includes mild dish soap, warm water, microfiber cloths, and a soft sponge. The mild dish soap will help remove grease and grime without damaging the paint, while the microfiber cloths and soft sponge allows you to clean without scratching the surface.

Step 2: Create Your Cleaning Solution

Mix a few drops of dish soap with warm water in a bucket. The exact ratio isn’t crucial, but a good starting point is a teaspoon of soap for every quart of water. This solution will be gentle enough not to harm the paint, but effective enough to clean off dirt and grime.

Step 3: Wipe Down the Cabinets

Dip a microfiber cloth into the solution, wring out the excess water, and gently wipe the cabinets. It’s essential to follow the grain of the paint to avoid streaks. This step should remove most of the surface dirt and dust.

Step 4: Scrub Tough Stains

If there are tough stains or sticky spots, gently scrub them with the soft sponge dipped in the cleaning solution. Be careful not to scrub too hard, as it could damage the paint. If the stain still doesn’t come off, you might need to use a specialised cleaner, but always test it on an inconspicuous area first.

Step 5: Rinse and Dry

After cleaning, rinse the cabinets with a cloth dampened with clean water. This will remove any soap residue. Then, dry them with a clean towel to prevent water spots or streaks. Any standing water can damage the paint over time, so dry the cabinets thoroughly.

Step 6: Regular Maintenance 

Regularly dusting your cabinets can prevent build-up that’s harder to remove. It’s recommended to clean your cabinets thoroughly every few months, depending on use. Regular maintenance will keep your cabinets looking their best and extend the life of the paint.

How to Clean Wooden Kitchen Cabinets?

Cleaning wooden cabinets is necessary to keep your kitchen looking fresh and tidy. Over time, cabinets can accumulate grease, food particles, and dust, which can be challenging to remove.  Follow this simple step-by-step process:

Step 1: Prepare a Cleaning Solution 

Firstly, you need to prepare an effective yet gentle cleaning solution on wooden surfaces. You can do this by mixing equal parts of white vinegar and water. This solution is mild and won’t harm the wood or its finish. If you’re not fond of the smell of vinegar, you can substitute it with a mild soap solution. Just remember to dilute the soap with water to ensure it’s not too harsh for the wood.

Step 2: Clean the Cabinets 

The next step involves cleaning the cabinets. This is particularly important after cooking when grease and food particles will most likely splatter onto the cabinet surfaces. Dip a clean cloth into the vinegar or soap solution you prepared earlier to clean the cabinets. I wore out the cloth to ensure it was damp but not dripping wet. Excessive moisture can damage the wood. Use a damp cloth to wipe down the cabinet doors and underneath the cabinets. Be sure to get into all the nooks and crannies where grease and grime can accumulate.

Step 3: Dry the Cabinets 

After you’ve wiped down the cabinets, it’s crucial to dry them thoroughly. Any moisture left on the wood can cause it to warp over time. To dry the cabinets, use a clean cloth to wipe over all the surfaces you’ve just cleaned. Make sure to remove all traces of the cleaning solution. This step protects the wood from damage and gives your cabinets a clean finish.

Step 4: Clean Inside the Cabinets Regularly

It’s not just the outside of the cabinets that needs cleaning. Every few weeks, you should also clean the inside of the cabinets. Start by removing everything from your cabinets. Then, using the vinegar or soap solution, wipe out the inside of the cabinets. 

Be sure to clean all the shelves and the inside of the cabinet doors. Once you’ve cleaned the inside of the cabinets, dry them thoroughly with a clean towel. Only then should you put everything back inside.

Step 5: Handle Spilled Food

If you often find food spills inside your cabinets, it might be worth investing in good-quality food storage containers. Glass or metal jars are great for storing spices and dry goods. They not only protect the food from bugs but also help to minimise spills. If food does spill inside your cabinet, don’t panic. 

Simply use a plastic putty knife to scrape off the dried food gently. This should remove most of the spill without scratching the finish on your cabinets. Once you’ve removed the bulk of the spill, use a soft rag dipped in dishwashing soap and warm water to clean the area. Again, remember to dry the area thoroughly once you’ve finished cleaning.

How to Clean Laminate Kitchen Cabinets?

Laminated kitchen cabinets are famous for their durability and variety of styles. However, they can attract dust and grime over time. Regular cleaning can help maintain their appearance and longevity. Follow these simple steps on how to clean laminate kitchen cabinets:

Step 1: Gather Your Supplies 

Before you start, gather all the necessary cleaning supplies. This includes a gentle microfiber cloth that won’t scratch the surface. You’ll also need warm water and mild dish soap to create a gentle cleaning solution. Cleaning kitchen cabinets with baking soda is very effective, as it is an excellent natural abrasive that can help remove stubborn stains. Lastly, a soft sponge will help apply the baking soda paste and scrubbing. 

Step 2: Remove Excess Dust 

Start by removing loose dust and dirt from the surface of the cabinets. A dry microfiber cloth is perfect for this task. Make sure to wipe all areas where dust can accumulate, including the corners and crevices.

Step 3: Prepare a Soapy Solution

Next, prepare a mild cleaning solution. Add a few drops of dish soap to a bowl of warm water. The dish soap will help cut through grease and grime, while the warm water will help dissolve the soap and make cleaning easier.

Step 4: Wipe Down the Cabinets 

Now, it’s time to clean the cabinets. Dip your cloth into the soapy water, wring out the excess water, and then wipe down the cabinets. Pay special attention to areas around handles and edges, as these areas accumulate more grease and grime. Make sure to rinse the cloth frequently to avoid spreading dirt around.

Step 5: Address Stubborn Stains

If you encounter stubborn stains or sticky spots, a paste made from baking soda and water can be very effective. Apply this paste to the stain using a soft sponge and gently scrub the area. The mild abrasive nature of baking soda helps to break down tough stains without damaging the laminate surface.

Step 6: Rinse and Dry 

After cleaning, it’s essential to rinse off any remaining soap or baking soda residue. Use a cloth dampened with clean water to do this. Finally, dry the cabinets thoroughly with a clean towel. This is an essential step, as allowing water to sit on the surface can cause damage to the laminate over time.

How to Clean Glass Kitchen Cabinets?

Cleaning glass kitchen cabinets can be simple if you follow the proper steps. Using suitable materials is essential to avoid scratching or damaging the glass. A simple guide:

Step 1: Gather Your Materials

You need a microfiber cloth, a bucket, warm water, mild dish soap, and vinegar. The microfiber cloth is gentle on the glass and won’t leave scratches. The dish soap and vinegar will work together to cut through grease and grime without damaging the glass.

Step 2: Prepare the Cleaning Solution

Fill the bucket with warm water. The water’s warmth helps dissolve the dish soap and vinegar, creating a more effective cleaning solution. Add a few drops of dish soap to help break down grease or oil on the glass. Then add a cup of vinegar; vinegar is a natural cleaner that can help to remove hard water stains and other residues.

Step 3: Remove Dust and Debris

Before you start cleaning, removing any loose dust or debris from the glass is essential. This is because these particles can scratch the glass when you start to clean it. Use a dry microfiber cloth and gently wipe the glass.

Step 4: Apply the Cleaning Solution

Dip the cloth into the cleaning solution and wring out the excess water. You want the cloth to be damp but not soaking wet. Wipe the glass in a circular motion; this helps to avoid streaks.

Step 5: Dry the Glass

After you’ve cleaned the glass, it’s essential to dry it thoroughly. Any remaining water can leave spots or streaks on the glass. Use a dry microfiber cloth and wipe the glass until completely dry.

Step 6: Repeat if Necessary

If you notice that the glass is still dirty after the first cleaning round, don’t worry. Sometimes, it may take a couple of rounds of cleaning to get the glass completely clean. Just repeat the steps until you’re satisfied with the result.

How to Keep Your Kitchen Cabinets Longer?

Maintaining the longevity of your kitchen cabinets involves a combination of regular maintenance, careful usage, and proactive measures. Some of the strategies you can employ:

1. Add Shelf Liners

Shelf liners are protective sheets you can place on the bottom of your cabinet shelves. They are a barrier between the cabinet material and the items you store. This is particularly useful for kitchen cabinets as they often house items that can leak, spill, or scratch the surface. 

Liners come in various materials like plastic, rubber, and fabric and can be easily removed, cleaned, or replaced when needed. They protect your cabinets and provide a clean and tidy look.

2. Close Cabinet Doors and Drawers

Leaving cabinet doors and drawers open can lead to accidental impacts and scratches or dents. It also exposes the cabinet interiors to dust and dirt. You can prevent physical damage and keep your cabinets clean by closing the doors and drawers when not in use. It’s a simple habit but goes a long way in maintaining your cabinets.

3. Use Cabinet Hardware

Cabinet hardware like handles and knobs allow you to open and close cabinets without touching the cabinet surface, reducing the chance of leaving smudges, stains, or scratches. They come in various styles and materials, allowing you to choose ones that match your kitchen decor. Regular hardware cleaning is also necessary to keep them shiny and new.

4. Avoid Moisture

Kitchens can become humid, especially when cooking. Wood cabinets can absorb this Moisture, leading to warping or swelling. To avoid this, ensure that your kitchen is well-ventilated. Using an exhaust fan or range hood can help remove excess Moisture. Also, any spills on the cabinets should be removed immediately to prevent water damage.

5. Protect from Sunlight

Prolonged exposure to direct sunlight can fade the colour of your cabinets and cause the material to warp. If your kitchen gets a lot of sunlight, consider using window treatments like blinds or curtains to protect your cabinets. 

Alternatively, UV-protective films can be applied to your windows to block out harmful rays while still letting in natural light. Regularly rotating items on open shelves can also prevent uneven fading. This additional measure can help maintain the original look of your cabinets for a longer time.

Hopefully, you got the answer to your question: how to clean kitchen cabinets. Maintaining a clean kitchen is not just about aesthetics; it’s about creating a healthier and more enjoyable space for you and your family. Regularly cleaning your kitchen cabinets can extend their lifespan, prevent pest infestations, and contribute to a healthier home environment. However, with a bus schedule you may not always have the time or energy to clean your kitchen deeply. 

That’s where professional cleaning services like NoBroker come in handy. We offer comprehensive kitchen cleaning services that can help you keep your kitchen spotless without the hassle. Remember, a clean kitchen is a happy kitchen. So, don’t wait! Give your kitchen the care it deserves today with NoBroker. Visit NoBroker for more information.

Frequently Asked Questions

Is it safe to use bleach on kitchen cabinets?

It’s generally not recommended to use bleach on kitchen cabinets, especially if they have a finish, as it can damage the surface; opt for gentler cleaning solutions.

2. Should I remove the cabinet hardware before cleaning?

Yes, removing hardware like knobs and handles before cleaning can make it easier to access all areas of the cabinets and ensure a thorough cleaning.

3. What is the best way to clean kitchen cabinets?

The best way to clean kitchen cabinets is to mix a solution of mild dish soap and warm water, then gently scrub the cabinets with a soft cloth or sponge.

4. Can I use vinegar to clean kitchen cabinets?

Yes, mix equal vinegar and water to create a natural cleaning solution for removing grease and grime from kitchen cabinets.

5. Should I use oil-based cleaners on wooden cabinets?

No, avoid using oil-based cleaners on wooden cabinets, as they can leave residue and potentially damage the finish; stick to mild soapy water.

Top Kitchen Cleaning Ideas and Hack for a Sparkling Space

Top Kitchen Cleaning Ideas and Hack for a Sparkling Space

How to maintain a clean kitchen, you ask? Between cleaning up after cooking, clearing up the inevitable mess, doing the dishes, and cleaning up everyday spills, your kitchen needs a ton of cleaning every day. 

With the ongoing pandemic and stay-at-home orders, your kitchen is easily one of the most frequented rooms in your house. With hygiene being the main focus and the need of the hour, it is crucial to clean your kitchen regularly, ensuring that whatever comes in contact with your kitchen and the surfaces in and around it is squeaky clean. Whether it’s a greasy stovetop or a tea-stained counter, cleaning every surface in your kitchen daily can indeed be challenging, especially when you’re doing so on a tight schedule.

Kitchen Hacks for Cleaning for Keeping it Neat and Organized

clean kitchen
Kitchen Wiping when done for flat surfaces down can help keep your space looking clean and preventing bacteria from growing on countertops. 

So, are you wondering how to maintain a clean kitchen? Here are some kitchen cleaning ideas, if you follow these hacks, trust us, it can be pretty straightforward. 

  1. Deodorise Sink with Baking Soda
  2. Warm Water for Tile Stains
  3. Clean Baking Sheets with Peroxide
  4. Overnight Oven Cleaning Method
  5. Effortless Oven Rack Cleaning
  6. DIY Wood Polish with Lemon
  7. Vacuum for Cabinet Crumbs
  8. Vegetable Oil Cleans Range Hood
  9. Soak Hood Filters in Soda

1. Baking Soda is Your Friend

cleaning kitchen by baking soda
Cleaning kitchen by baking soda

Entering a kitchen with a foul smell, often caused by waste, can be quite unsettling. The presence of a smelly sink is particularly unpleasant and needs immediate attention. 

To address this issue, start by adding a generous amount of baking soda into the sink drain. Let it sit for a while without running any water for 15 minutes. Then, pour 1/4 to 1/2 cup of white vinegar down the drain, observe the bubbling reaction, and wait for another 15 minutes. 

This simple solution should effectively eliminate the odor. To avoid future problems, remember to wash your dishes promptly instead of letting them accumulate. 

2. Use Warm Water on Tough Stains

use warm water for cleaning kitchen
Use warm water for cleaning kitchen

What you need to do is use warm water, and a clean cloth, coupled with a good quality tile cleaner, which shall help you to scrub the dirt, grease and stains off from the tiles. Then you may go ahead and wipe the tiles over with a clean cloth and warm water, and repeat the process if persistent stains remain. You may also use water-absorbent kitchen cleaning wipes that are available in the market. Finally, dry the kitchen tiles with a clean tea towel for a glossy professional finish. Here are some attractive kitchen wall tile ideas for your home!

3. How to Clean Your Baking Sheets?

clean kitchen with your baking sheets
Clean kitchen with your baking sheets

Use hydrogen peroxide and combine it with baking powder. This iconic duo of baking powder and hydrogen peroxide can be instrumental, as it helps you restore more than just your sinks and tub. It can add a fresh sheen to the baking sheets as well.Sprinkle your sheet with baking powder, spray it with a few sprays of hydrogen peroxide, and then finish it off with one more layer of baking powder. Come back in a few hours, then go ahead and wipe down the sheets to reveal your freshly cleaned baking sheets.

4. Clean Your Oven While You Sleep

clean your oven in kitchen
Clean your oven in kitchen

Forget auto-clean; if you use this high-temp oven setting, it is known to set off a mini fire within your home and can leave your kitchen in a smelly funk. Instead, all you have to do for this kitchen cleaning hack is fill up an easy deodorise and spray bottle with a solution of ⅓ cup water, ⅓ cup white vinegar, and half a cup of baking powder. When the oven has cooled down, remove the grills and coat the inside with the solution. Make sure you aren’t touching the heating elements. Are you planning to renovate your kitchen? Here are some kitchen design tips for you!

Do this at night and let this kitchen cleaning hack work its magic. 

5. Make Sure to Wash Your Oven Rack 

use powdered detergents to wash your oven rack
Use powdered detergents to wash your oven rack

Powdered detergent is not only for washing clothes. Bring back the original lustre of your oven racks without scrubbing and scratching the shelves by soaking them in a tub that is filled with powder washing detergent. Once you do this, let it sit for at least four hours, giving this effective kitchen cleaning hack enough time to start working before removing and rinsing with clean water.

6. Polish Your Woodwork with Lemon Oil and Vinegar 

clean kitchen with lemon oil and vinegar
Clean kitchen with lemon oil and vinegar

This DIY cleaning kitchen tip is an excellent substitute for wood polish. It leaves a lovely scent and shine that is bound to make the surface not only look good but, at the same time, smell great as well. You’ll need 2 parts vinegar, 2 parts olive oil, and 1 part lemon juice; you can add as much as you need as per your requirement.

Read: Proven Tips and Tricks on How to Get Rid of Small or Big Rats at Home

7. Clean Your Kitchen Cabinets

cleaning kitchen cabinets
Get rid of that grime, and let the surfaces in your kitchen shine!

You may clean your kitchen cabinets by using your vacuum. What you can do, instead of having to waste time trying to pick up crumbs with a cloth, push the vacuum brush attachment to suck them. This kitchen cabinet cleaning tip works wonders on pantry shelves, too.

8. Wipe Down Your Range Hood with Oil

wipe kitchen range hood with oil
Revitalise Your Kitchen! Follow Our Kitchen Cleaning Guide to Wipe Down Your Range Hood with Oil for a Sparkling Transformation.

As you can probably see, your range hood is a grease magnet, and dust latches onto it over time; the surface does get harder to clean with ordinary sprays. One of the best-known cleaning hacks for kitchen stoves is to use vegetable oil. For this kitchen cleaning hack, just add a few drops to a cloth or paper towel, wipe the surface down, and the grime is gone.

9. Soak Your Range Hood Filter

soak your range hood filter
Soak Your Range Hood Filter

So, you are searching for kitchen cleaning hacks to help clean your stove’s hood filter?  Well, it’s true; the filter on your stove’s hood vent can get greasy, dusty, and gross fast. To clean it, boil water in a large pot and gradually add 1/2 cup of baking powder. Next, you need to put the filter in the pot to soak. If the entire filter doesn’t fit inside the pot, you can wash each side separately. Caution it may be hot, so when following this kitchen cleaning tip, make sure to use gloves!

10. Freshen Up the Garbage Disposal

use citrust to combat smelly garbage in kitchen
Use citrust to combat smelly garbage in kitchen

To neutralise odours and clean your garbage disposal, toss in a few lemon or orange peels along with a cup of ice cubes. Turn on the disposal and let it work its magic. The citrus helps to combat odour, and the ice helps clean the blades.

11. Use Baking Soda for Pots and Pans

baking soda cleaning agent for kitchen
Baking soda cleaning agent for kitchen

For stubborn burnt-on food residue in your pots and pans, sprinkle a generous amount of baking soda and add a bit of water. Let it sit for a couple of hours or overnight, and then scrub. The baking soda helps break down the burnt-on food, making it easier to clean.

12. Microwave Cleaning with Vinegar and Water

vaporise vinegar water inside your microwave for a quick clean
Vaporise vinegar water inside your microwave for a quick clean

Fill a microwave-safe bowl with one cup of water and 1–2 tablespoons of vinegar. Microwave on high for 5 minutes. Carefully remove the bowl (it will be hot) and wipe down the inside of the microwave with a sponge. The steam helps loosen grime and stains, making them easy to wipe away.

13. Descale Your Kettle with Vinegar

vinegar for cleaning in kitchen
Baking soda is your friend. Vinegar is your best friend.

To remove limescale build-up from your electric kettle, fill it with an equal mix of water and white vinegar. Boil the liquid, then let it sit for at least an hour before rinsing thoroughly.

14. Keep Stainless Steel Spotless

olive oil for cleaning things in kitchen
Olive oil: The secret sauce to the gleamy sinks and stainless steel appliances that you see on TV

To clean and polish stainless steel appliances or sinks, apply a small amount of olive oil to a soft cloth and wipe in the direction of the grain. This will remove smudges and fingerprints, giving the stainless steel a clean, shiny finish.

Owning a house is indeed a huge responsibility, but at the same time, it is also very rewarding. You’ve invested in something you can call your own. And when you invest in something, for sure, you’d like to see it thriving. You needn’t worry about a stressful day cleaning up your space; you can read this article on kitchen cleaning tips and tricks to help you out. If you are bogged down with too much work, don’t stress. Just click the link below to hire the best professional cleaners in the industry. NoBroker Cleaning Services will take of things for you. 

Frequently Asked Questions

Q: Hack on how to clean a black stone kitchen sink?

Ans: To clean the black stone kitchen sink you have to take a spray bottle and add half water and half white vinegar. Then you will have to spray your whole sink with this solution and gently scrub the surface. Whilst doing so, ensure to pay close attention to any problem areas. Once you’re happy and you feel like you’ve cleaned the whole sink, rinse all the vinegar away and then dry it with a separate cloth.

Q: What is some kitchen cleaning tips, tricks and tricks?

Ans: 1. Divide your kitchen into 3 or 4 primary zones. 
2. Wash the dirty dishes accumulated in zone 1 and add them into your utensil rack.
3. Post this hand wash and dry all the dishes in the other zones.
4. Carry on to wipe down your countertops in the remaining zones and dry the sink.
5. And then, last but not least, let the cycle continue.

Q: What are some quick kitchen cleaning tips?

Ans. Here are eight steps to quickly help you clean your kitchen.
1. Clear the clutter off your countertop.
2. Then clean the sink and the drainage system.
3. Follow this by dusting the tops of the fridge and cabinets. 
4. Clean the smaller appliances.
5. Then clean anything else that stays out on your counters. 
6. Post this scrub down the exterior of your stove and oven. 
7. Wipe all your counters. 
8. Deep clean the sink.

Q: What are some cupboard-cleaning hacks?

Ans. What you may do is mix a 50:50 solution of vinegar and warm water in a spray bottle. Then you have to add a few drops of liquid dishwashing solution that is ideal for getting rid of grime from surfaces. Lastly, spray the solution outside the cabinet doors and let it sit for a minute or two. Post this, and wipe it down with a cloth. 

Q: How to easily clean kitchen stains on your stovetop? 

Ans. Make a paste from equal parts of the solution of baking soda and water. Then you need to apply it to the tough or stubborn stains on the burner. Post this, allow it to soak for up to 20 minutes, and then scrub the burner with a damp sponge.

Q: How to remove small insects from the kitchen?

Ans: To efficiently eliminate small insects from your kitchen, regularly clean surfaces with vinegar and water solution and ensure all food items are securely stored in airtight containers.

Q: How to clean a kitchen exhaust fan?

Ans: Confused about how to lean a kitchen exhaust fan? Begin by unplugging the fan, then detach the filters and soak them in a mixture of hot water and degreaser. Afterwards, wipe down the fan blades and interior with a damp cloth dipped in the same solution.

Q: How to clean the kitchen fast

Ans. For a swift kitchen cleanup, concentrate on decluttering surfaces first and then use a multi-surface cleaner for countertops, appliances, and sinks, ensuring to tackle one section at a time for efficiency.

A Guide on How to Clean Kitchen Sink Effortlessly

A Guide on How to Clean Kitchen Sink Effortlessly

Your kitchen sink and pipes require regular cleaning, as they don’t self-clean with soap and water. Discover “how to clean kitchen sink” effectively in this blog post, and learn why it’s essential for a hygienic kitchen.

How to Clean Kitchen Sink?

How To Clean Kitchen Sink?
(Clean your kitchen sink thoroughly with the help of a cloth or sponge)

You have to do these simple steps to clean your sink effectively.

1. Remove Debris

Clear any food scraps or debris from the sink. Wash up kitchen sink. Use a sponge or paper towel to wipe away loose particles with a steel sink cleaner

2. Disinfect and Shine

Apply a mixture of equal parts water and vinegar or dish soap. Scrub the sink with a soft brush or sponge to disinfect and bring back its shine. Use a stainless steel sink cleaner and a kitchen drain cleaner

3. Eliminate Odors

Combat odors by pouring a cup of baking soda down the drain, followed by a cup of vinegar. Let it sit for a few minutes, then flush with hot water.

4. Polish Stainless Steel

For stainless steel sinks, use a cloth soaked in olive oil to polish and remove water spots, leaving a brilliant shine.

5. Prevent Clogs

Regularly pour boiling water down the drain to prevent clogs. Avoid pouring grease or oil, as they can solidify and cause blockages.

6. Maintain Garbage Disposal

If you have a garbage disposal, run it with cold water and citrus peels to freshen and clean the disposal unit.

7. Regular Cleaning Routine

Incorporate sink cleaning into your regular kitchen cleaning routine to ensure it stays hygienic and odor-free.

And your sink is squeaky clean. It will hardly take you 10-15 minutes to do. We have made it super easy and quick for you!

How to Clean Kitchen Sink Drain?

How To Clean Kitchen Sink Drain
(Running down some water from time to time can help keep the drain clean without needing any extra maintenance)

Unclogging your kitchen sink drain might seem like a daunting task, but fear not – we have a simple solution that takes less than 10 minutes and requires only one magical ingredient: baking soda. We fondly call it “THE BAKING METHOD” – a quick and effective way to unclog your kitchen sink with baking soda and clean your kitchen sink drain seamlessly. Curious about the name? Stay tuned, and we’ll reveal the secret behind this powerful DIY technique.

Follow these steps to clean your sink drain using the baking method.

  • Take some water in a utensil- ½ to 1 glass of water
  • Heat it to 140 degrees Fahrenheit. In simple words, boil the water!
  • Now that the water is hot enough add some dish wash liquid or detergent to the water. 
  • Pour it slowly down the drain 
  • Throw in some baking soda into the drain- one or two teaspoons
  • Let it sit there for a couple of minutes
  • Now pour the hot water again down the drain

How to Clean Kitchen Sink Drain Pipe?

How To Clean Kitchen Sink Drain Pipe
(Maintaining clean drain pipe is as important as cleaning the sink and drain)

Now let’s see how to clean kitchen sink drain naturally

Here are a few steps for the same:

  • It is where the kitchen sink cleaning liquid comes into action.
  • Purchase a drain cleaner from a store. You can get one kitchen sink blockage cleaner online quickly.
  • Before moving ahead, read the instructions on the drain cleaner packaging carefully. This is advised because different cleaners have different instructions to use. 

Also, remember that cleaners work better with warm water and NOT hot water.

  • Now pour a significant amount of kitchen sink pipe cleaner down the drain and let it sit there for a while.
  • Then, pour some warm water down the drain and flush the cleaner.

We would advise you to follow this step-by-step instruction for better results.

How to Clear Kitchen Sink Clog-Clean sink drain pipe?

How To Clear Kitchen Sink Clog
(Using an unclogging device can be much easier and faster to clean a clog)

Annoyed due to the clogged sink and stagnant water on the basin? Here is how to unblock the kitchen sink:

  • Make use of a wet dry vacuum. Follow the Manual instructions to set the vacuum for damp use. Use a kitchen pipe cleaner.
  • Place the end of the vacuum at the drain entrance and tightly seal the end and the drain.
  • Turn on the vacuum at the highest. The pressure of the vacuum will unclog the clog. The waste will run down the drain due to the pressure. 

How to Clean Stainless Steel Sink? 

How To Clean Stainless Steel Kitchen Sink
(Clean steel sink quickly without much hassle)

Here’s how to clean steel sink and make it sparkly with these kitchen basin cleaner hacks:

  • To keep your sink looking shiny, keep doing light cleaning every day. Use a kitchen basin cleaner
  • Clean the waste residues every day and avoid the waste from drying up
  • Use only one cleaner to clean. Don’t mix various cleaners. 
  • If you are still confused, then call a professional cleaner.

How to Clean Kitchen Sink with Baking Soda?

How To Clean Kitchen Sink With Baking Soda
(You can use baking soda right from your kitchen counter to clean the sink)

As mentioned earlier, “THE BAKING METHOD” is a bit different from the previous one.

  • Sprinkle some baking soda on the entire kitchen sink area
  • Let it sit for a few minutes
  • Scrub the sink with a cloth properly 
  • Use water and rinse off the residue

How to Remove Smell from Kitchen Sink?

How To Get Rid Of The Smell In The Kitchen Sink
(Clean the kitchen sink and the smell that comes along with it)

To get rid of the stinky smell:

  • Pour a ½ cup baking soda on the sink
  • Then go ahead and pour a cup of vinegar 
  • Let the solution sit there for a couple of hours
  • Pour some hot water and flush everything down the drain

You can also use an excellent smelling dishwasher to clean the sink and get rid of the stink. Or, you can also squeeze some citrus juice into the sink and leave it there for a few hours. This will absorb the entire bad odour.

How to Remove Stains from Kitchen Sink?

How To Remove Stains From Kitchen Sink
(There is always a way to remove unwanted, stubborn stains from the sink.)

Thinking about how to clean kitchen sink stains? Follow these steps:

  • Before starting, wear a pair of hand gloves
  • Pour some Jif onto a sponge
  • Spread the Jif all over the sink
  • Leave it for a couple of minutes, and then use the sponge to rub on the sink in a circular motion. You can also use a kitchen sink cleaning brush
  • Target the stained area specifically
  • Now wipe all the product with a cloth and wash the sink
  • Clean dry the place with a dry cloth

How to Clean Black Stone Kitchen Sink?

How To Clean Black Stone Kitchen Sink
(Clean the black surface of your kitchen sink and make it shiny plus sparkly)
  • Make a mixture of white powder with hydrogen peroxide
  • Apply the paste directly all over the sink
  • Cover that particular area with a white plastic cover
  • Let the paste dry out completely
  • Remove the plastic and rinse off the white paste with the help of a sponge or cloth

How to Clean White Kitchen Sink?

How To Clean White Kitchen Sink
(Cleaning a white sink can be a very tough task to do. But, there is an easy way for that too)
  • Spread some kitchen sink cleaning powder onto the sink area.
  • Add a tablespoon of white vinegar to the sink.
  • Now scrub the sink and rinse
  • At last, take half a teaspoon of bleach and clean the sink quickly with it. This will ensure that the kitchen sink remains shiny as before.

How To Clean a Copper Kitchen Sink?

  • Begin with Gentle Cleaning: Start by washing your copper sink with warm, soapy water and a soft sponge. Avoid abrasive materials that can scratch the surface.
  • Utilise Natural Acidic Solutions: For deeper cleaning, use a mixture of lemon juice or white vinegar with salt. Apply gently, let it sit for a few minutes, and then rinse thoroughly.
  • Polishing the Copper: To maintain the lustre, make a paste using flour, salt, and white vinegar. Apply this paste, let it sit for 30 minutes, and then rinse and dry for a brilliant shine.
  • Tackling Tough Stains: For stubborn stains, create a paste of baking soda and lemon juice. Apply it to the stain, leave it for a few minutes, and then wash it off.
  • Regular Maintenance is Key: Regularly rinse and dry your copper sink after each use to prevent water spots and mineral deposits.
  • Avoid Harsh Chemicals: Steer clear of bleach or commercial cleaners, as they can damage the copper’s natural patina.
  • Embrace the Patina: Understand that copper naturally develops a patina over time. This unique ageing process adds character and is part of the charm of a copper sink.
  • Professional Advice for Major Issues: For significant discolouration or damage, consult a professional cleaner specialising in copper.

There you go! You have a clean kitchen sink drain ready. And now you have got a clean sink in your kitchen. Be it a black sink, white sink or stainless sink, and you have a way to clean every single type of single. Try these methods. You can come back to this post again and thank us later on! If you still have questions and queries on how to clean a kitchen sink, then visit our page and get help from qualified experts. Deep clean your kitchen sink NOW!

Frequently Asked Questions

Q1. Can I clean the sink with bar soap?

Ans: Yes, you can clean your sink with bar soap.

Q2. Are there any disadvantages of using vinegar & baking soda for cleaning the sink?

Ans: There are no disadvantages of using vinegar & baking soda for cleaning the sink.

Q3. How to clean kitchen sink blockage easily?

Ans: How to clean kitchen sink blockage easily?

Q4. How much time would the mentioned techniques take to complete?

Ans: It will take you 30 minutes to do any of the mentioned technique

Q5. Can I use bleaching powder for a black stone sink?

Ans: Yes, you can use bleaching powder for a black stone sink.

3 blog on Kitchen Cleaning in Cleaning

Leave a Reply

Your email address will not be published. Required fields are marked *

People Also Ask

Home Cleaning Starting ₹359 Only
Revive Your Space with Expert Cleaning!
X